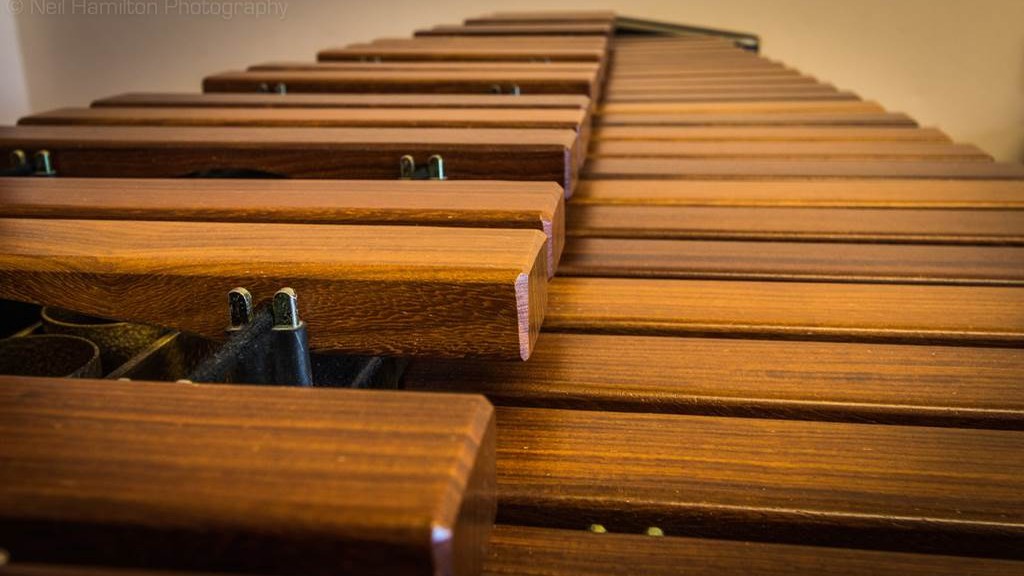
The previous work that we had done to establish the suspension hole locations provided precise angles for the suspension rails. These angles, coupled with the bar lengths, established the fore/aft spacing of the natural and accidental bars. We decided to use 1 inch thick rails, so we had to just ensure that all of the aft ends of all of the natural bars had sufficient spacing from the front accidental support rail. We choose to leave 1/4 inch spacing between the natural bars and the support rail just to allow us a little wiggle room. Constructing the xylophone frame, including the rails that support the bars and the two end pieces, was pretty straight-forward woodworking, but we had to put some thought into the suspension posts and how the resonator tubes would be mounted.
Here are some practical matters that had to be addressed that might affect the frame design and therefore had to be addressed first:
- What to use for the posts that support the suspension strings?
- The diameter of the resonator tubes?
- How to support the resonator tubes?
The question of posts was important, because, depending on the thickness, it might have a bearing on the bar spacing. The post height might also affect the frame design, so we needed to figure that what our posts were going to be before building the frame.
There was a similar issue for the resonator tubes – the diameter might drive the spacing of the frame. Although this seemed like less of a concern than the post selection, I had learned from my previous woodworking projects that you always select hardware first (e.g., it is easier to build a box around available hinges than to find hinges that fit a project you’ve already built). So it seemed smart to figure out what material was available and cost effective.
I wasn’t as concerned about the last question, how to mount the tubes, but it seemed like giving this some thought could keep me out of trouble down the road.
The Posts
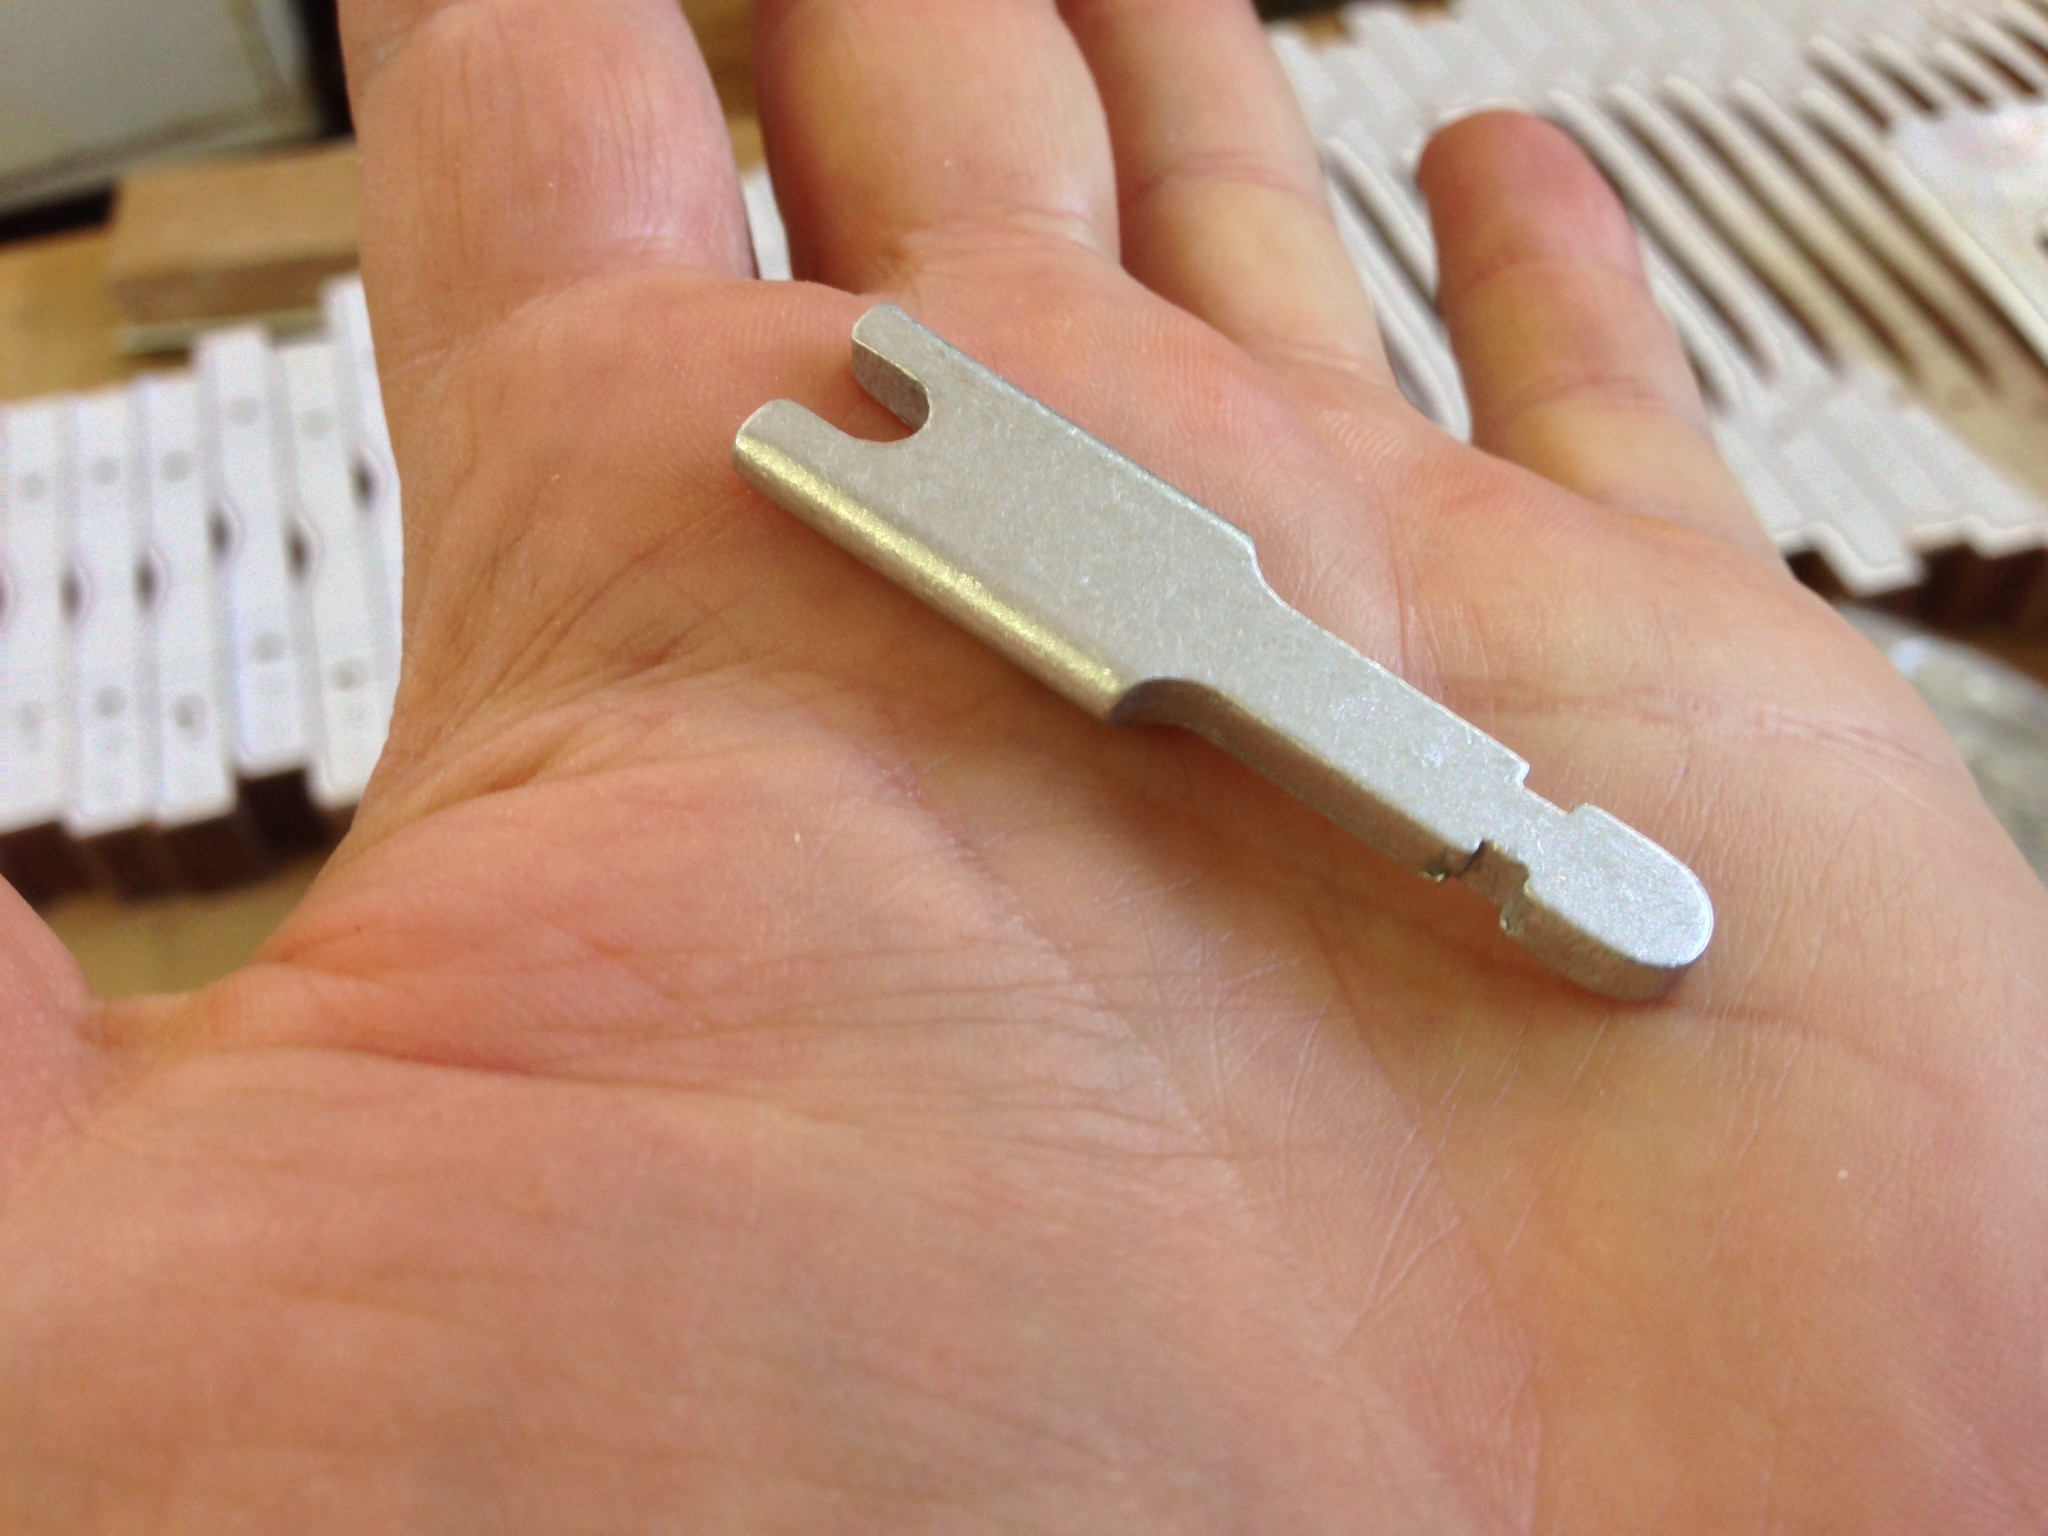
I anguished over what to use for posts. Most commercial xylophones that I found had posts like the ones shown in the image at the top of this page. I saw a few variations, like posts with a through-hole rather than a “saddle” to support the string, but all of the posts were similar and were cut from flat metal. In addition to the post itself, most included a rubber sleeve to keep the bars from buzzing against the metal during play. I had found a source of replacement posts made for Musser-brand instruments here, but they’re about 90 cents which doesn’t sound bad until you realize that I need 108 for the instrument! I also needed the rubber sleeves, which were sold by the same vendor for about a buck a piece – ouch! So I wracked my brain trying to determine an easy way to build them. Dr Entwistle weighed in too, but every idea we came up with (e.g., brass bolts with a bit of machining) was either nearly as expensive or required a bunch of per-post labor. Now I am pretty patient when it comes to repetitive tasks (hey, I built a xylophone, right!), but hand machining 108 posts was more than I could stomach.
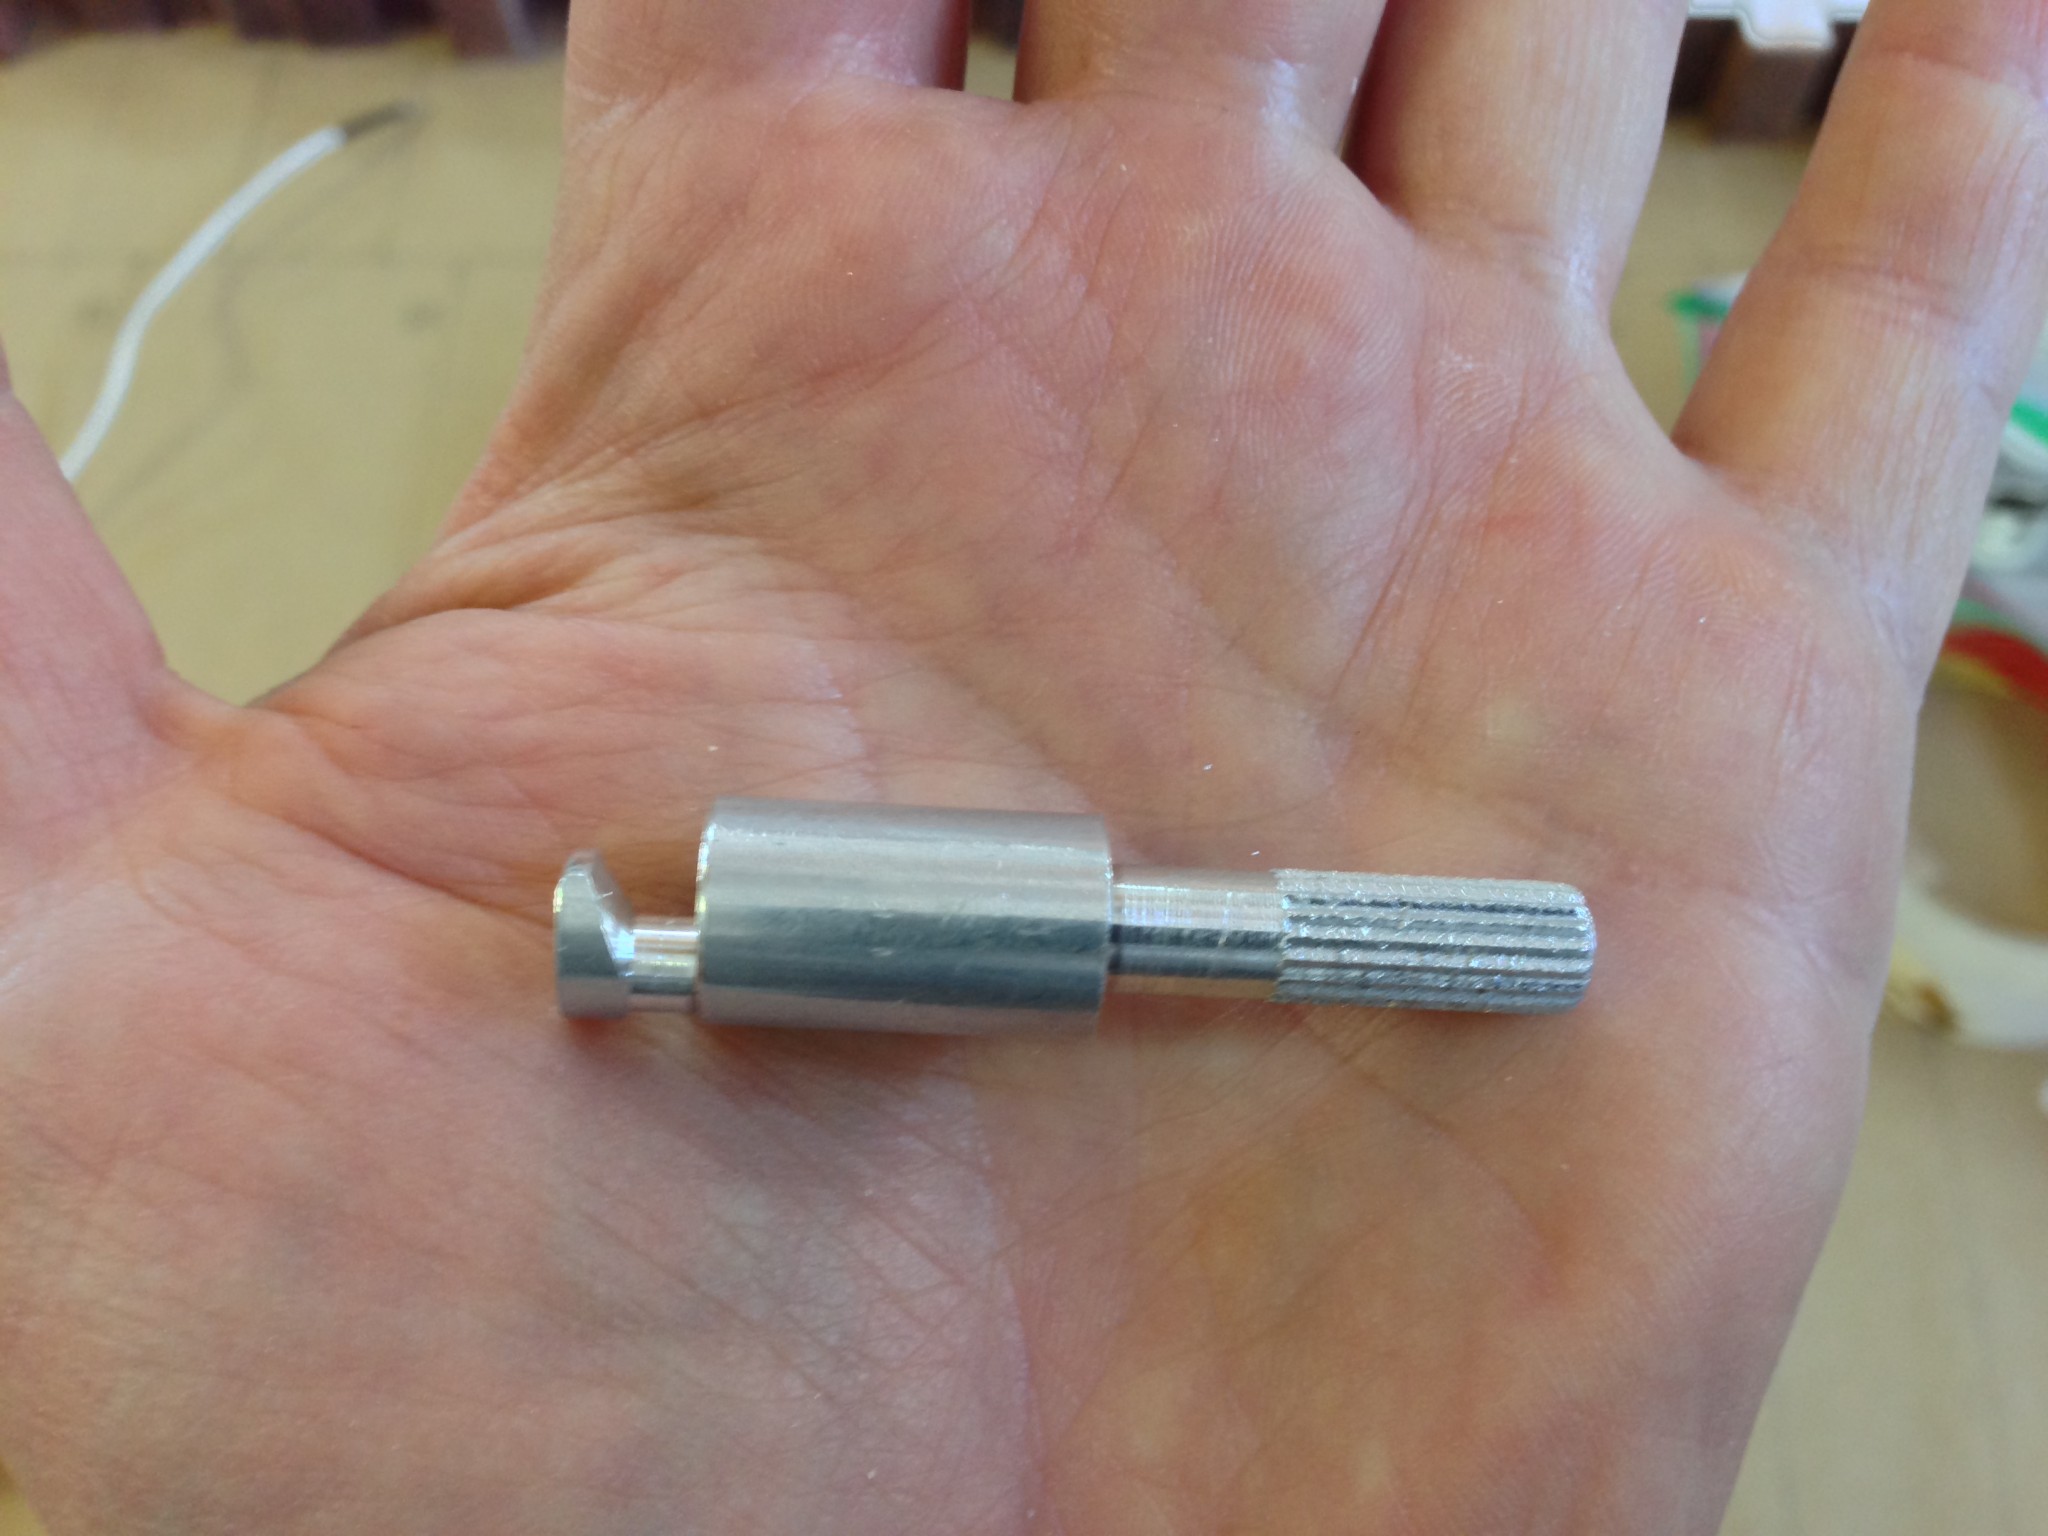
So at the end of the day, I bit the bullet and just bought the posts from the link above. I also bought some springs that tension the suspension strings and some really nice end posts that support the tension load of the strings at the corners. It was hard to tell from the photos on the vendor website, but when I got these I was actually pretty pleased with the quality. Here are a couple of photos of the “saddle posts” and the corner posts:
The springs were nothing special, but were inexpensive, so I went ahead and bought them from the same site. Here was an invoice of the parts:

Actually, you will notice that I messed up and only ordered 100 posts – argh! I ended up ordering another 10 from a different vendor that had cheaper shipping for small orders.
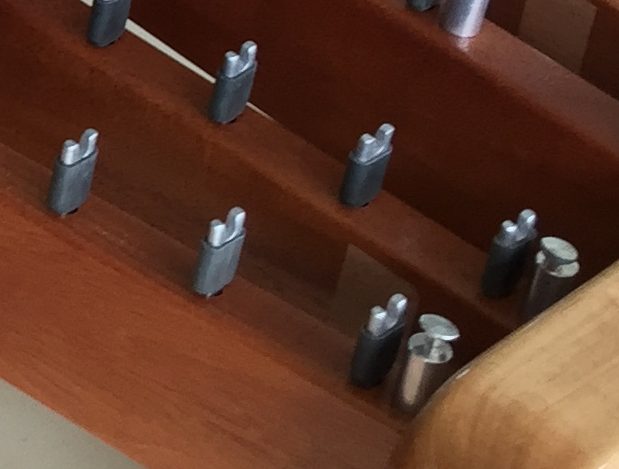
The only thing left was the rubber bumper material – I wasn’t so keen on giving Musser another hundred bucks for a bunch of little rubber pieces. I had some surgical tubing around for another project, and I found that with a little soapy water for lubrication, I could slide it over the posts for a perfect fit. The only downside was that it was that standard tan color that is typical of surgical tubing. However, I found some black tubing of the same size from this source. This was only $10.95 (with free shipping) for 10 feet, which was more than enough. Sweet, that’s about a $100 savings! It looks great on the post too. Check this blow up of the posts with the surgical tubing and the corner posts.
Resonator Tube Material Selection
We really, really, really wanted to make the resonator tubes out of brass. Polished brass just looks so classy, and we were trying to make an instrument that looked as good as it sounded. However, the cheapest price I could find for brass was about $13 per foot. Considering that we needed about 20 feet (more about the resonator tube lengths in a later post,) that was a pretty expensive option. We also considered that brass is pretty heavy, so the supports would have to be beefy enough to support the weight. At the end of the day, we compromised and decided to make the tubes out of aluminum – not quite as sexy as brass, but after applying a brushed finish and some lacquer, they looked pretty good.
We just had to figure out the diameter. Our rosewood bars are 1.5 inches wide, and we planned to space them about 1/4 apart. So the tubes could be up to 1.75 inches in diameter. However, the paper by Bork (cited on a previous post) suggested that resonator “cross-talk” with neighboring notes could be an issue if the bars were too close together. This potential issue would be worse for the B-C and E-F bars, which are only a semitone apart and adjacent. However, we also considered that a diameter of 1.75 inches would be convenient from a mounting standpoint, because the bars would be butted together, which might ease assembly and aesthetics.
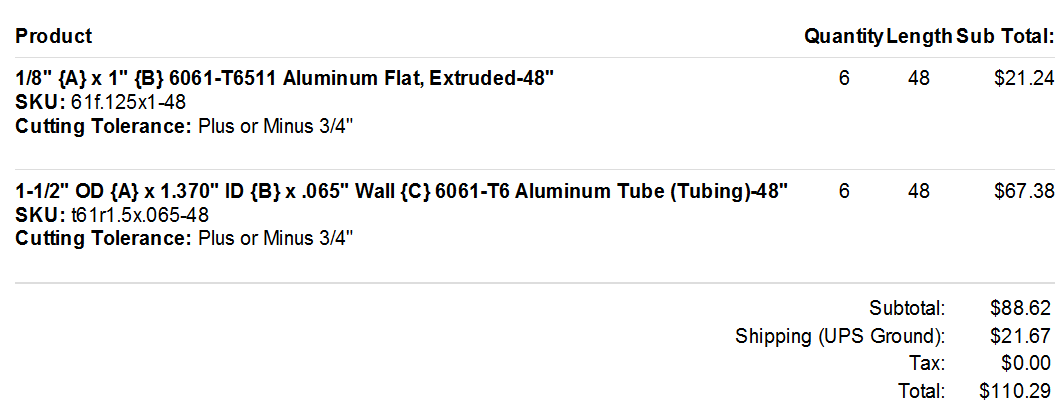
In the end, the solution was driven by the available materials; after a local supplier gave me a quote of $350 for 20 ft of aluminum tubing (!!), I started looking online. Ultimately, I bought 1.5 inch tubing with 1/16 walls. This was about $15 per 4 foot length from Speedy Metals, which is a very reasonable price. (In general Speedy Metals is a great vendor with lots of selection and prices – I love this place!) I calculated that I needed 5 pieces, but bought 6 just in case. Speedy Metals also had 1.75 inch tubing, but only in 1/8 inch wall, which was a lot more expensive and overkill for this application.
Mounting the Resonator Tubes
All of the xylophones that I saw connected the tubes together to form an assembly and then hung them in some fashion from the frame ends. I decided to attach wood cleats to the frame ends to support the resonator tube assemblies. You’ll see more of this in a later post, but I used 1×1/8 aluminum flat stock to tie all of the tubes together. The aluminum is 6061, which is pretty stiff, but bendable; this was important because I had to bend the these support rails at the end where the wood support rails converged.
Here is a snapshot of the invoice for all of the aluminum:
Next Up
Chronologically, the next step that Jack and I performed on the xylophone was the construction of the resonator tubes. However, that included a bit more research and math, so to mix things up a little I will discuss the frame construction in the next post. Finally a little wood working!