Most of the commercial xylophones that we checked out had simple metal support frames and wheels. Additionally, almost all include a mechanism to raise the height of the instrument. Although practical, the aesthetics of these frames leave a lot to be desired.
While we could have welded up a frame and then had it powder coated, we decided to make ours out of wood, mostly because we wanted it to look good.
We did have some requirements for our frame:
- We wanted it to look good!
- It had to be stout enough to last for years.
- The height needed to be adjustable as Jack grows. (Although we didn’t need a rapid adjustment method like you’d want if you were trying to accommodate different musicians.)
- The assembly had to come apart – we assume this instrument will follow Jack when he grows up and moves away.
We considered whether it needed rollers, but at the end of the day, decided we didn’t need them since the instrument would be used in our home, and including them would require a more bulky frame.
Construction
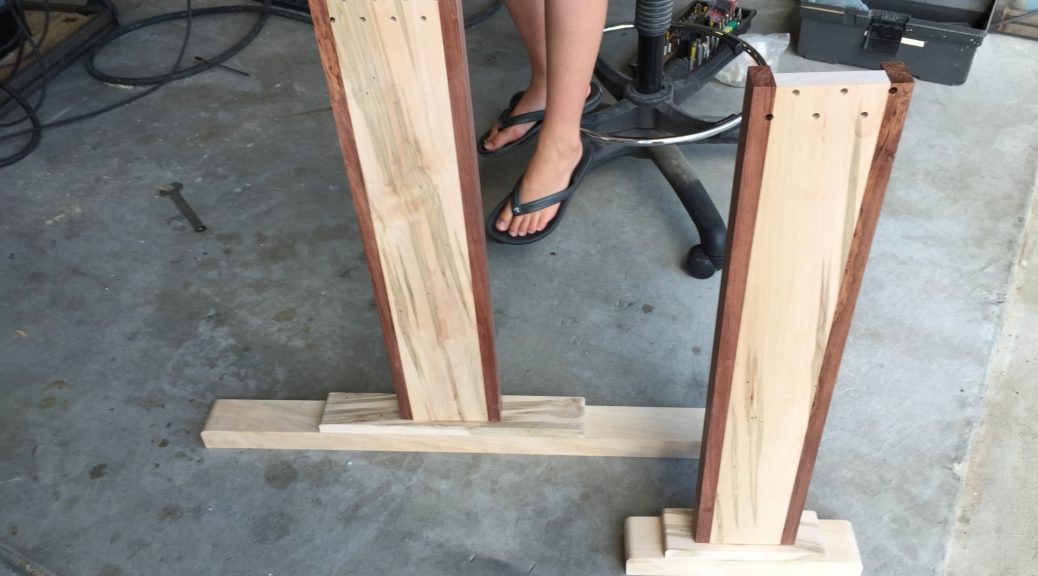
We don’t have many photos of the construction process for the legs, since it is pretty straightforward woodworking. If you’ve gotten this far in this process, I assume you have the skills to bang out the legs. However, there are a few comments on the construction that may be noteworthy.
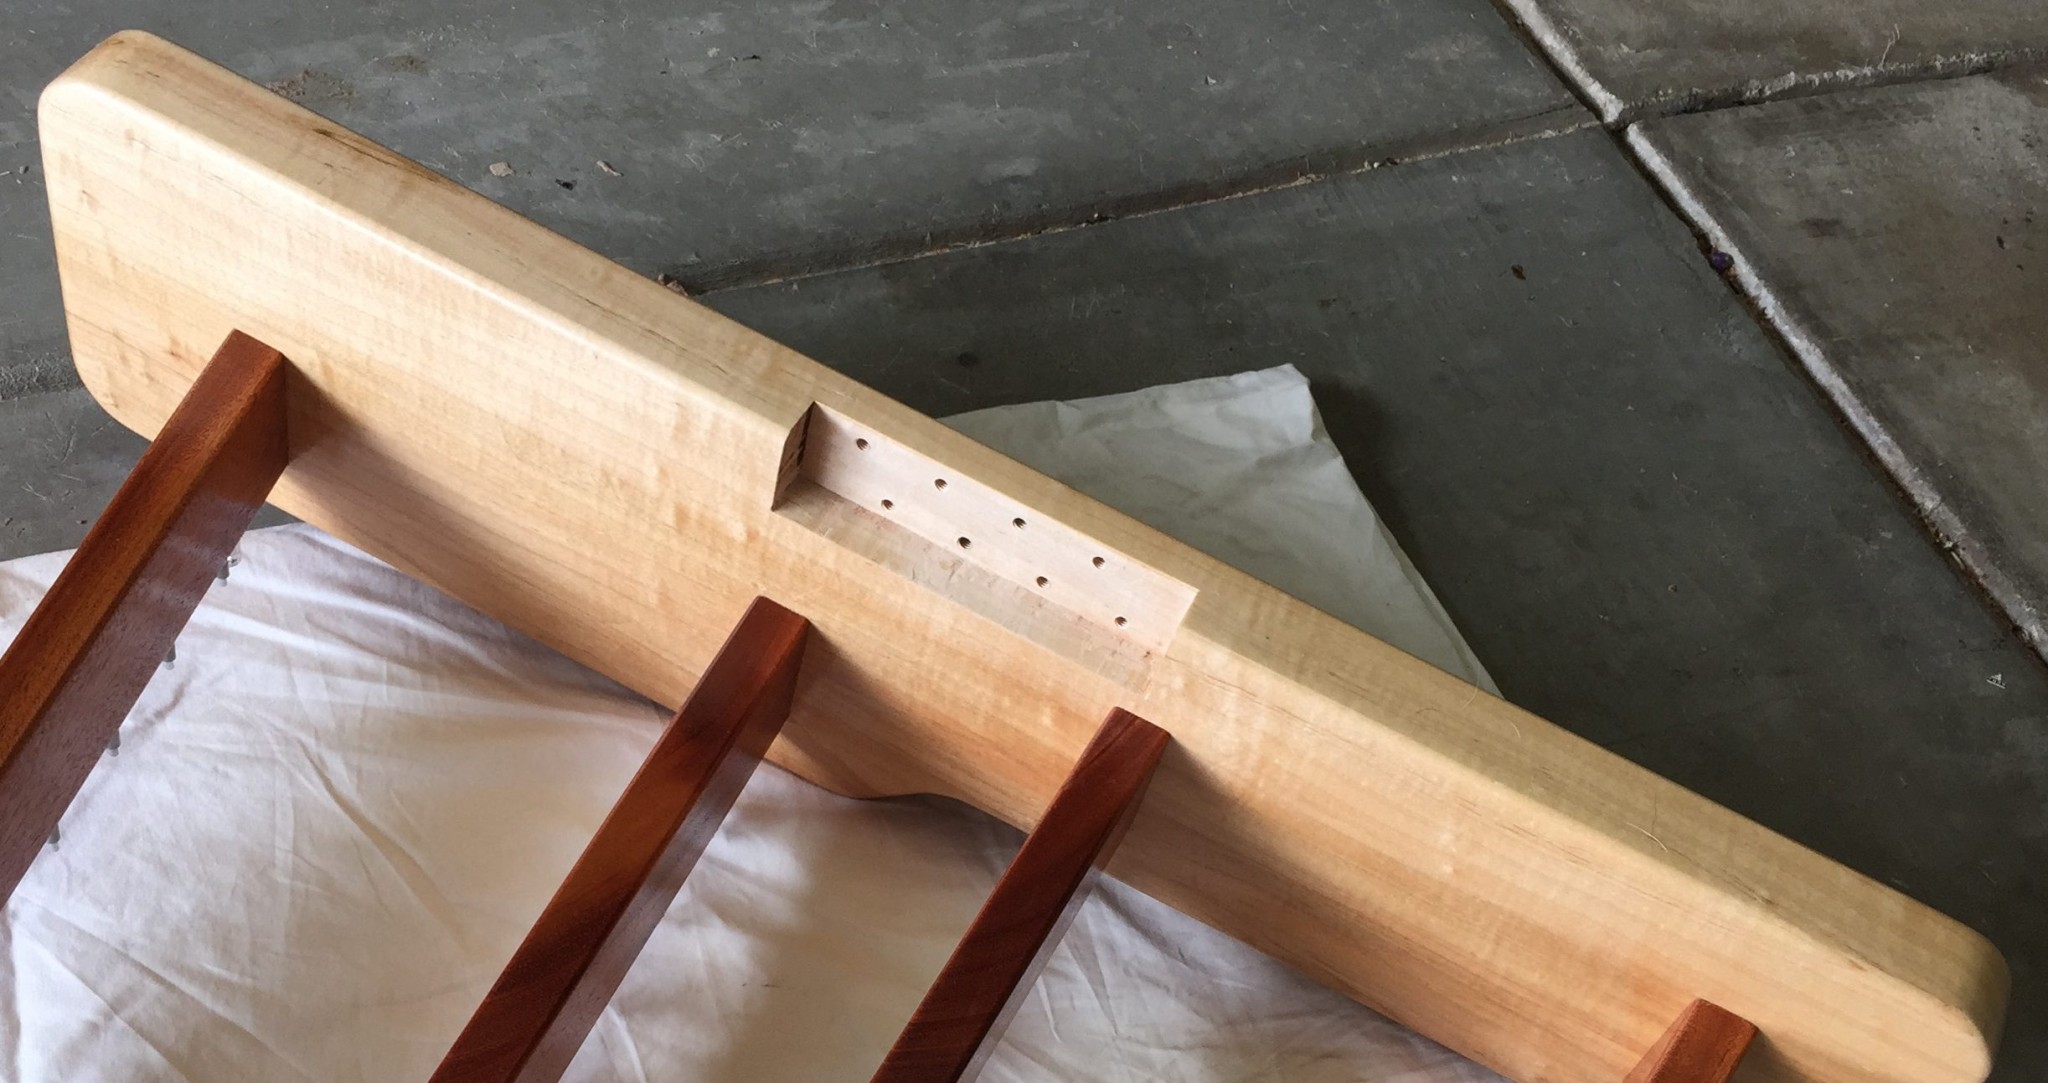
First, we were concerned about the integrity of the legs as they attach to the frame ends. Recall from the previous posts that the frame ends have big-ole mortises that receive the legs. Here is a zoom of the mortise in the long frame end.
The idea was to make the frame stiles so that they slipped tightly into the mortise, and then use bolts to attach the leg to the frame. So we cut the mortises first, and then sized the legs to fit. Even though the frame ends are thick maple, there is a long lever arm on the legs that puts considerable force on this joint. We addressed this in two ways. First, as shown in the photo, there are 8 bolts that hold each leg on. Although a bit unorthodox, I have found that machine threads hold pretty well in hardwoods, as long as you are careful not to over-tighten the bolts. So I tapped 1/4-20 threads into each hole using a bottoming tap. This gave about 3/4 of an inch of threads for each of the 8 bolts. When all the bolts are snugged up, the integrity of the joint is really good. We considered using metal threaded inserts, but the bolts all seemed to snug up solidly so that seemed like overkill. If this were a traveling instrument that required frequent assembly and disassembly we definitely would have opted for them.
When we fabricated the legs and bolted them on, there was quite a bit of left-right sway in the instrument. We kind of expected this because the legs only slip into the mortise about 1.5 inches (i.e., 1.5 inches in the upward direction). Even if the legs were glued in to frame ends, the wobble wouldn’t have been reduced, since it is the result of natural flexing in the maple end pieces. So the second thing we did was to add corner braces. Here’s a picture of what I am talking about – it shows the brace at the right end of the instrument:
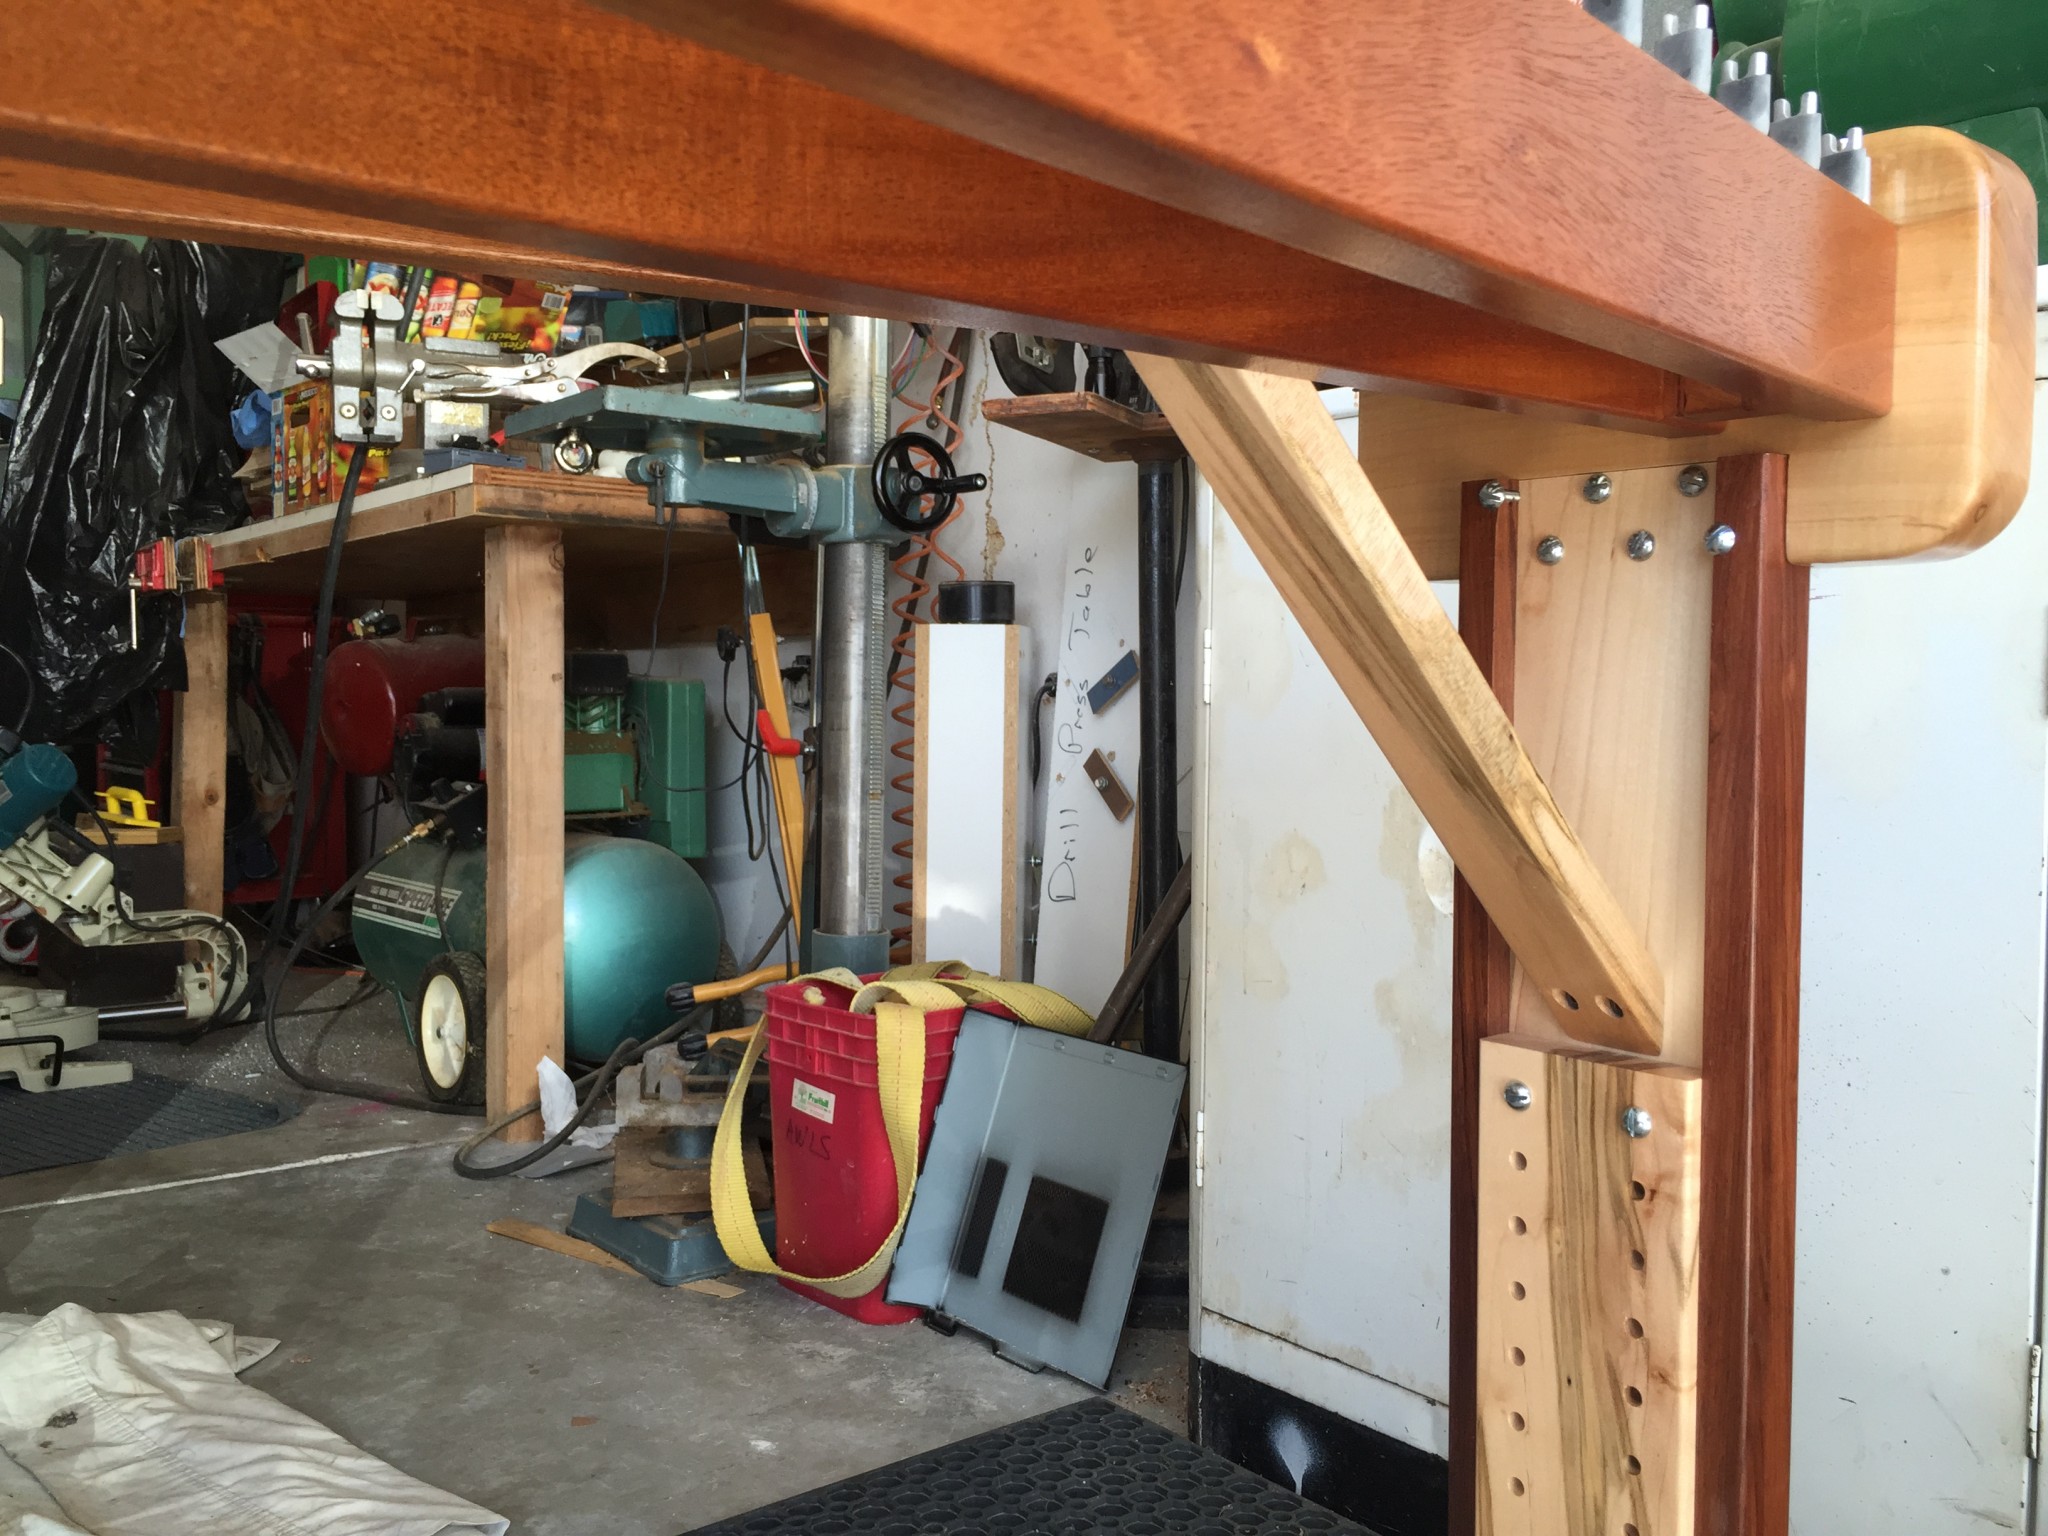
Man, these braces did the trick! No more wobble – the instrument was rock solid. The braces are bolted in with countersunk 1/4-20 screws as well, so are removable. The to end of each brace is bolted to a spanner block between the rails. Very straightforward, but effective.
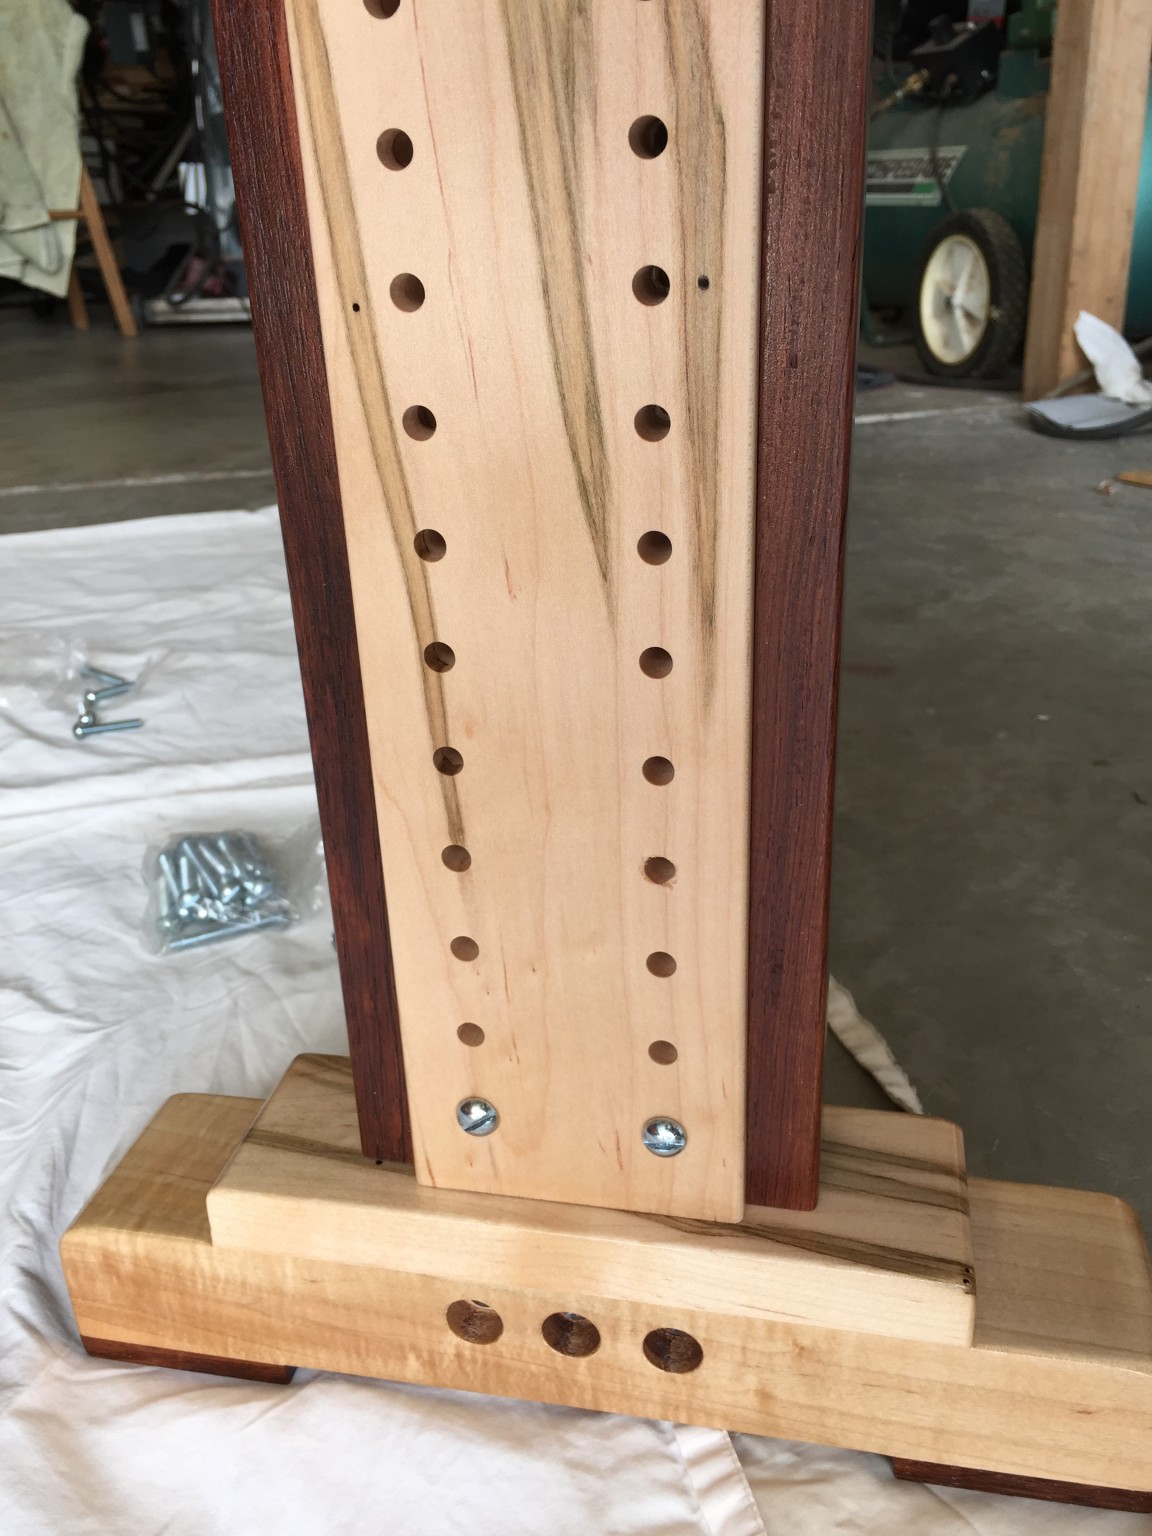
This photo also shows our approach to height adjustment too. Basically, the lower leg assembly slides into a channel contained of the upper leg assembly. The channel was built by attaching two rosewood stiles to the ambrosia maple leg. It seemed a bit gratuitous to use Honduras rosewood for these leg components, but it was wood that was leftover after making the bars. Plus, aesthetically, it nicely tied the legs into the rest of the instrument. Here is another picture of one of the legs that shows the upper and lower leg assemblies:
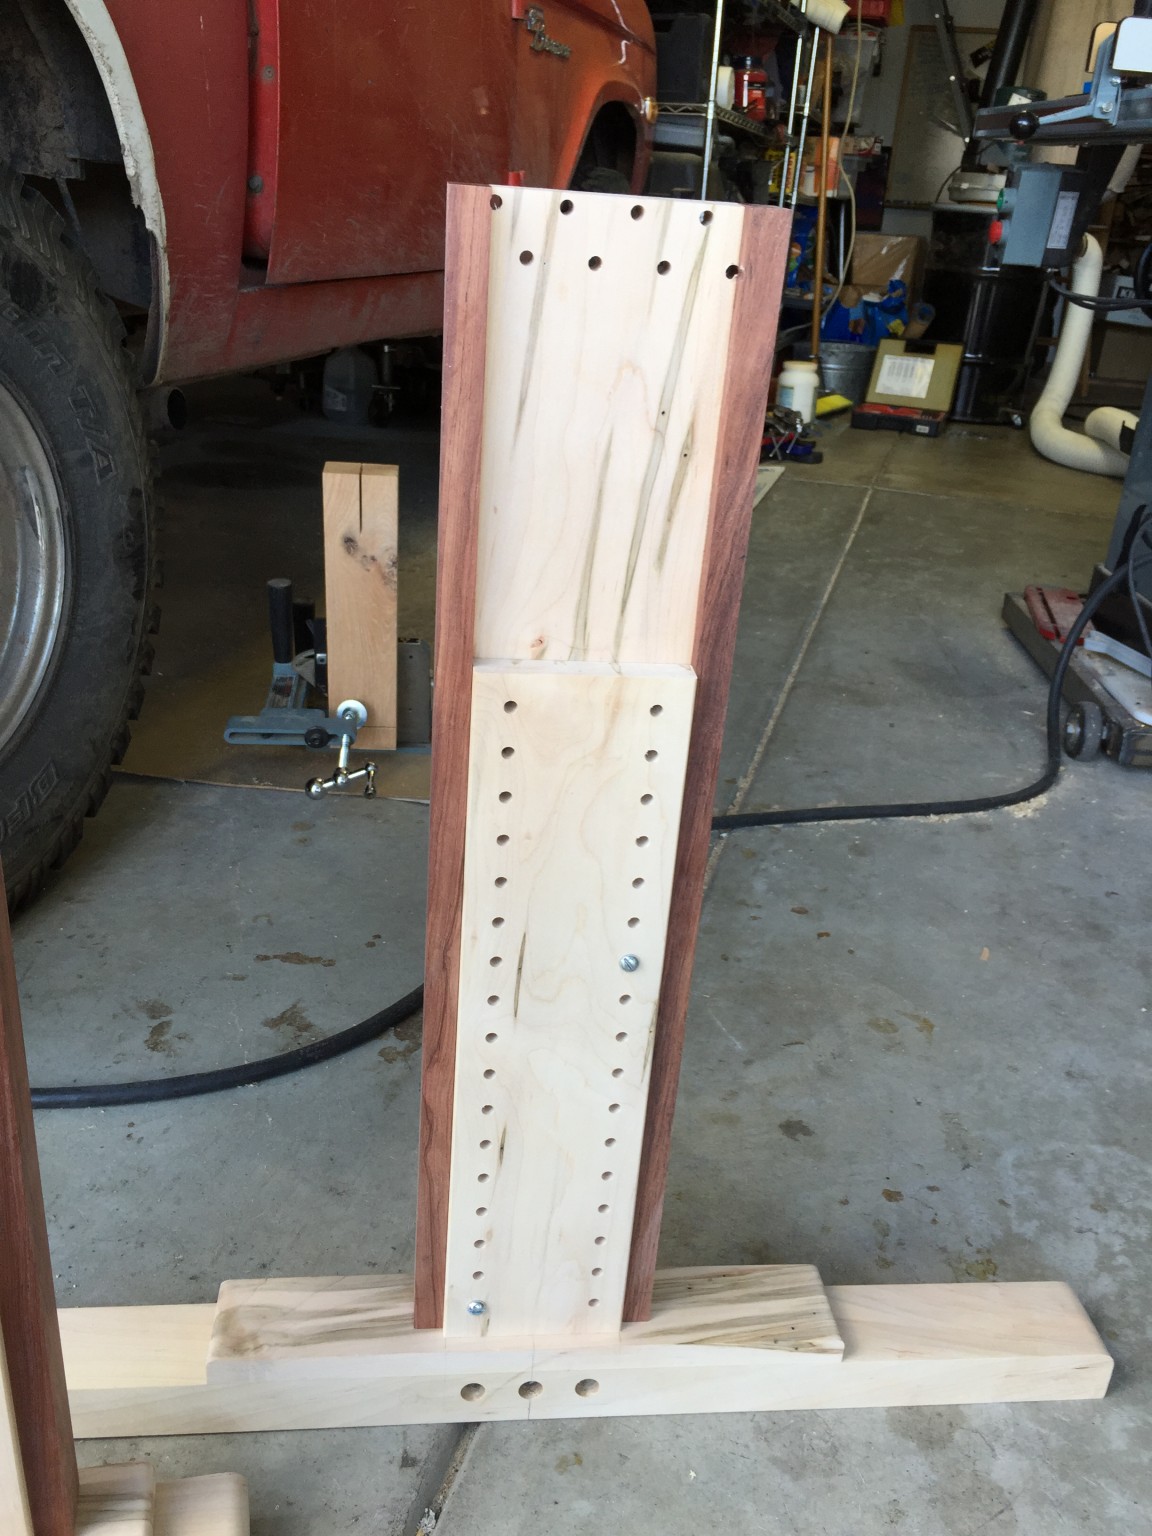
…and another photo of the leg assembly that more clearly shows the channel:

This photo also shows the 8 bolts that attach the upper leg to the frame end. I wasn’t thrilled with the placement of the outer two bolts which happened to land on the joint between the rosewood and maple. I considered routing out the rosewood material around these bolts so that they sat flush with the maple, but didn’t get around to it; although it looks a cheesy, the bolts are functional and hold snugly. Plus, these bolts are not visible from the top of the instrument – you have to get under it to see them. Further, removing this wood without causing a bunch of tear out would be tricky, so I decided it was best to leave it be.
The feet
We don’t have a lot of photos of the foot construction either. Again, this was pretty standard woodworking, and there are lots of ways to fabricate the feet. Nevertheless, there below are a few tidbits that might be generally useful.
We wanted the feet to be removable from the lower leg, which complicated the design a bit. Mechanically, the lower leg is fastened to the foot via a deep mortise in the foot that accepts the lower leg. This mortise needed to be deep enough to provide front-back stability in the instrument. Aesthetically, we wanted to avoid corner braces on the leg bottoms, so that means that the mortise must support the full torque of this joint. The maple we chose for the legs wasn’t thick enough to support these deep mortises, so we created to stacked design shown in the photos. The top and bottom pieces of the foot were made separately, and then glued together. Then, we added the large mortise to the laminated foot. We were very careful to make the mortise as tight as possible to avoid wobble in this joint. Here is a photo of the lower-right foot:
The photo also shows the means for bolting the foot to the lower leg. Using a forstner bit, we drilled holes in the inside of the foot that were large enough for the heads of our 1/4-20 pan-head screws. Then, we drilled through-holes in the lower leg tenon, and tapped the back side of the foot to receive the screws. This approach allowed the screws to pull the leg tenon snugly against the foot, allowing for a pretty secure joint.
The last thing we did was to attach 1/4 inch thick heals to the ends of each foot. These were from rosewood scraps that we had laying around, and allow better stability on an uneven floor.
Wrap It Up
That’s pretty much it. Maybe it wasn’t 613 steps to build this thing, but it was a lot!
I hope this info is useful to someone out there. Like I said in the introduction, the whole point of writing all of this up is to fill the information gap that I experienced; hopefully this does that!
Someone asked me if a person could build a xylophone given the information on this site. I hadn’t thought about that particular question before, however, after pondering it for a bit, I think the answer is “yes!” Clearly, this is not a step-by-step guide, but if you have woodworking skills, I believe there is enough info here to make the bars. Recall that I included PDFs for all 44 bars, so you could print these and replicate my bars with a little care.
I did not include the Matlab-based bar tuning software, because very few folks have Matlab, so I think there is such a limited audience for that. However, my computer-based tuning method was a little unorthodox anyway. Most commercial builders use a strobe tuner on their bars. For example, check out this How It’s Made video showing how Malletech makes their bars. Notice the guy switching back and forth between the tuner and the sander? Looks familiar doesn’t it….
Anyway, that’s about it. If you find this info useful, please leave a comment – I’d love to hear about your own efforts and will try to help if I can.
Happy building!
Rich and Jack
(But mostly Rich)
Brilliant! Amazing! and thank you SO much for taking so much time to share. Greetings from Australia. I’ll have to wait a few years for my new born to be old enough for us to do this together
Thanks for the comment Will. Glad you enjoyed it – this is a pretty “vertical” subject, but I hoped a few folks would stumble across the site and find the material useful.
Yeah, your wife probably wouldn’t appreciate you having the baby out in the shop quite yet 🙂
Although I do recall mowing the grass with my first born in a baby carrier on my chest. The hum of the mower put her right to sleep!
BTW, not sure if you guys get Popular Mechanics out there, but our xylo is going to be in the Readers Contribution section of the September issue. Pretty cool!
I was thinking of building a simple 8 note xylophone for my 7 month old granddaughter but after reading all of the effort you put in to make yours, I am exhausted. I am a physicist and am very impressed with all of the analysis you used to calculate shapes and resonant frequencies, etc. Congratulations, I hope that your son will one day appreciate the effort you put it, but of course you did not have to document it. Thanks for that! I found your post by trying to find some guidance for shaping the wooden keys.
Thanks for the compliment Dennis. My son is 20 now and still loves this instrument. The best part of all of this is that we spent so much time together building it and geeking out! While he doesn’t play it much anymore, he clearly takes a lot of pride in it and embraces the idea that it is an heirloom that will be in his own living room some day.
Best, Rich