For too long I’ve wanted to get some photos of some of my projects (mostly woodworking at this point, but plan to augment). Posting on this page got me off the dime on that. This is mostly just a page of photo galleries, but I’ve tried to add a few words of explanation. Perhaps I will fill in more later…
The projects below are mostly in chronological order, with my guess at the year that they were completed. These are not all of the projects I’ve built over the years, because I’ve given some away and some or too pedestrian to include (e.g., cabinets for mud-room, drawers in closet, etc.), but this is a good sampling of some of my work over the last 20 years or so.
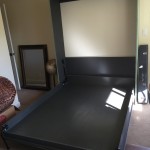
Murphy Bed (Feb 2016)
This is a project that mama wanted for our office. When we have guests, they were stuck on one of those inflatable mattresses that feel OK when you first lie down, but then you wake up with a back-ache. Truth be told, this was not fine woodworking – I basically bought a hardware kit from Easy DIY Murphy Bed and followed the instructions, which are well thought-out and comprehensive. The basic bed looks like a really boring box on the wall, so we sexed it up by adding baseboard molding to make some faux doors and a drawer. The best part was the finish that Lynette put on, which is green milk paint. She first painted with a dark grey color, and then covered with milk paint. The bed was pretty plain before she put this sweet finish on it.
Jewelry Box – 2014?
OK, this says it was finished in 2016, but I started the project in 2006! No joke – 10 years. In my defense, I hadn’t been working on this the whole time. It was one of those projects that I would work on for a while, and then put on the shelf. It has kind of become a joke in my family, since I started it as an anniversary gift for Lynette (or was it a birthday?). Of course, I didn’t get it finished for our anniversary, so I a said it would be done for Valentine’s day, then… Well, you get the picture. However, I was able to give it to her for her birthday in March of this year. I never said I was fast 🙂
Also, I submitted this project to “Reader’s Gallery” of Fine Woodworking magazine. It got rejected, but ya gotta try, right? Here is the blurb I wrote for that that includes some details about the project:
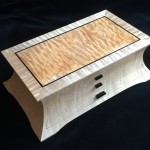
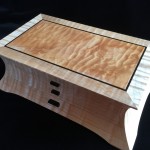
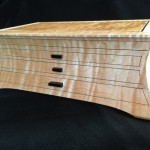
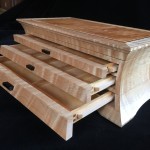
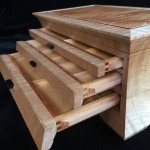
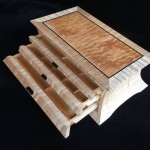
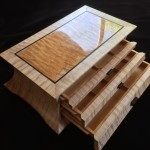
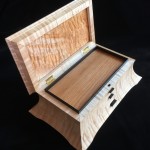
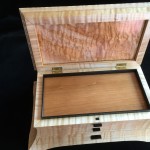
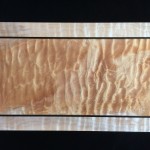
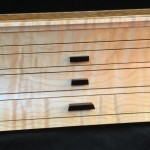
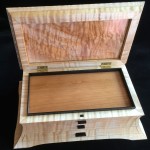
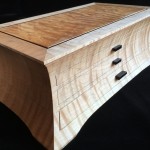
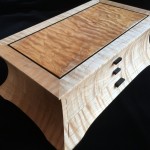
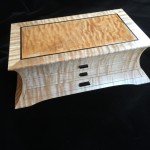
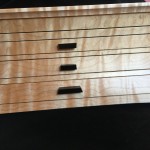
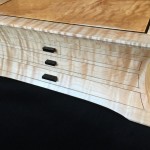
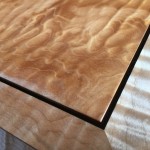
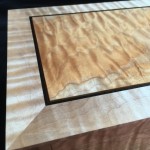
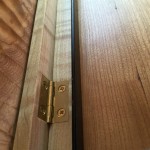
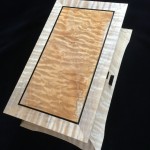
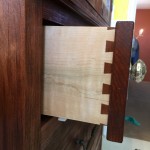
About 10 years ago I started a jewelry box project for my wife, and promised it as a gift for an upcoming wedding anniversary. For my woodworking skill level, the project was ambitious in that it involved curved sides and drawers that were scroll-cut from the curved face. Further complicating the project was that it was constructed of 8/4 solid maple, making the scroll saw work challenging. I spent some months working on the project, which I designed on a computer to work out the complex internal jointry, but ultimately missed the anniversary deadline! Over the subsequent years, I worked sporadically on the project and many times offered it up a gift for the next important event. However, ultimately it was put on a shelf due to the demands of family life and my small children. Over the years, I would pull it out, scratch my chin for some time, perhaps make a few cuts and then return it to the cabinet for another day. About a year ago, with my children in their teens and a bit more time on my hands, I decided, in earnest, to finish the project. Indeed, I gave it too my wife this Valentine’s day as a token of our love. The box is made from figured maple with ebony details on the top, pulls and feet. The solid-wood, floating, top panel is figured maple of a different variety and is finished with a high gloss, buffed lacquer finish. The rest of the box is finished in satin lacquer. The draw slides were milled into the solid maple side pieces prior to assembly, and the draws were made of cherry and maple.
Anyway, here are some photos. I will try to add more info on this project, because the construction was really tricky so there might be some ideas that might be useful to others. For example, I spent more time making jigs than cutting the box itself!

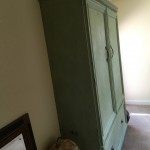
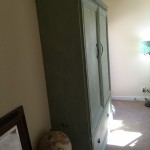
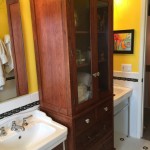
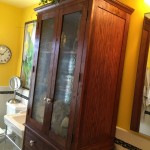
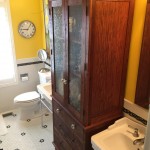
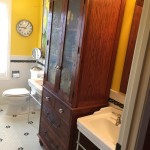
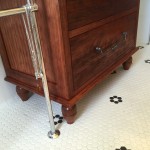
Bathroom hutch – 2013
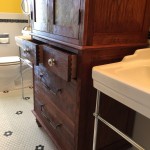
A few of years ago we remodeled the kids’ bathroom. I did all of the rough-in, shower basin dry pack, plumbing, electrical, etc., and hired a few items like drywall and tile. This bathroom is pretty small, but the kids needed storage for towels and stuff. So we needed a tall, skinny cabinet to fit between the sinks. This is where building your own furniture pays off – you can build something that fits perfectly for a spot. So we bought and installed two pedestal sinks, which established the dimensions for the cabinet. It was a little tricky to get the aspect ratios of the doors and drawers right because the whole think was so tall and skinny, but I sketched various options until we found a decent look.
Lynette kept saying that she wanted something that looked “found” – like something from an antique store. The cabinet is made from dimensioned Cherry, but to try to get an old-but-refinished look, I brushed all of the wood with a very coarse wire wheel (DeWalt DW4907). I built the mandrel shown here to hold the wire wheel in the drill press.
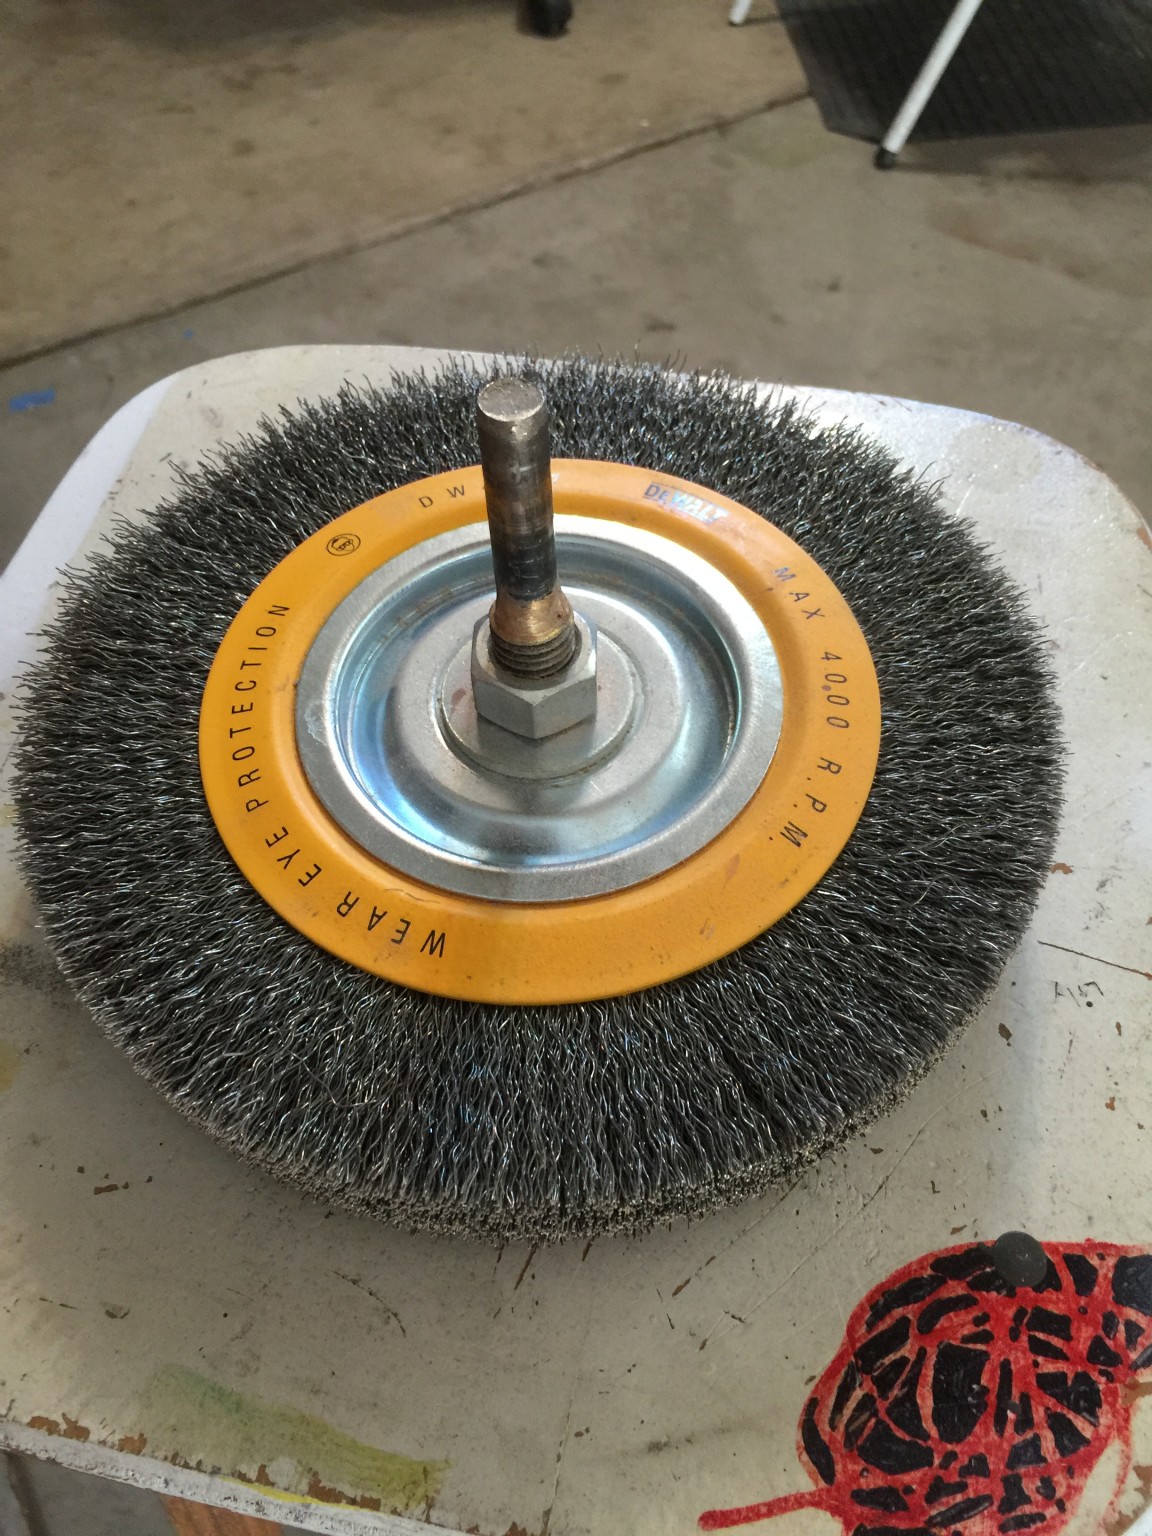
I got the kids to help me, and we ran all of the dimensioned piece-parts against the wheel, which resulted in a sort of distressed wood finish. Prior to applying finish, I a dark gel stain to fill most of the scratches in wood, and followed with some light sanding. The result wasn’t quite as rustic as I was shooting for, but it did add interest to the piece. (Not sure the photos below really show the finish.)
Also, this was the first time I tried my hand at wood turning – I made the four feet for the cabinet. Despite my best efforts, all four feet turned out a little different. Anyway, I guess that shows that it is a custom piece of furniture!
Jack’s Loft Bed – 2004
When Jack was just a little tyke (like 2), I built a bed/dresser/desk combo for for him. This project was interesting, because I designed it all in a CAD program first. Because it filled the whole corner of the room, I needed to “see” it in 3D before I could commit to building. The bed was build from Ash and plywood, and then painted. I also welded up the steel ladder, because we couldn’t find anything off-the-shelf that was suitable. The bed makes really good use of the space in this fairly small room, and Jack still digs it. The photos don’t show it well, but there is an integral desk at the end of the bed.


Bookshelf – 2001?
When the kids were little, their toys were cluttering the living room, so we decided we needed a bookshelf (toyshelf?). About the only thing notable about this piece is that it is solid White Oak – only the back is plywood. This is one solid (and heavy) piece of furniture.

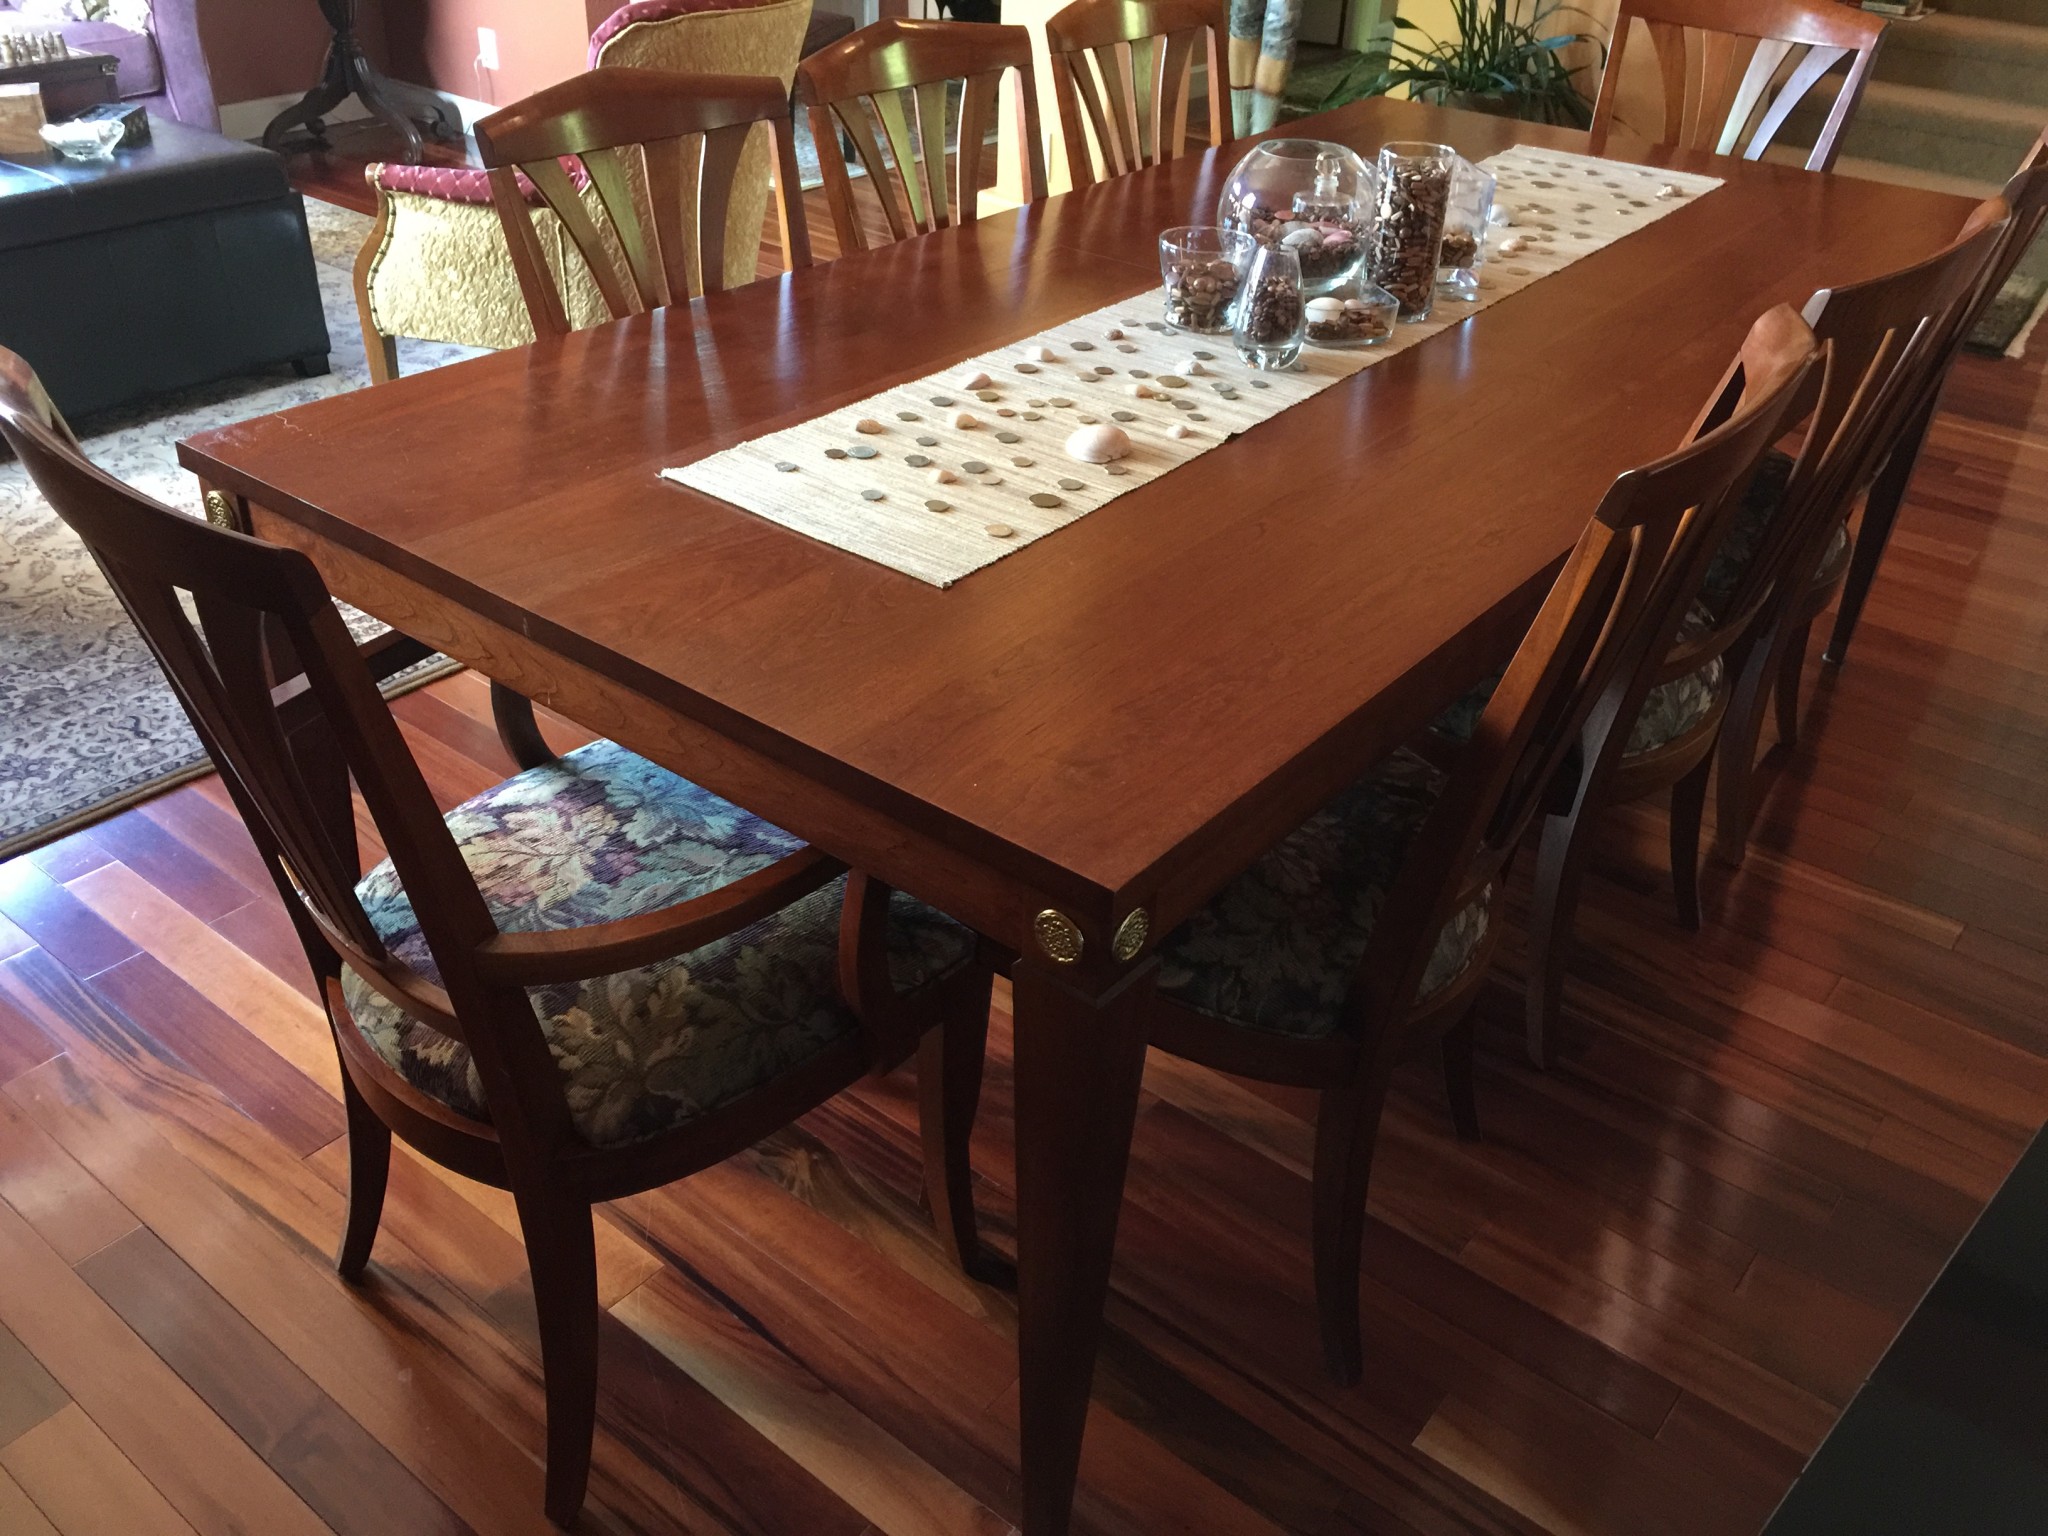
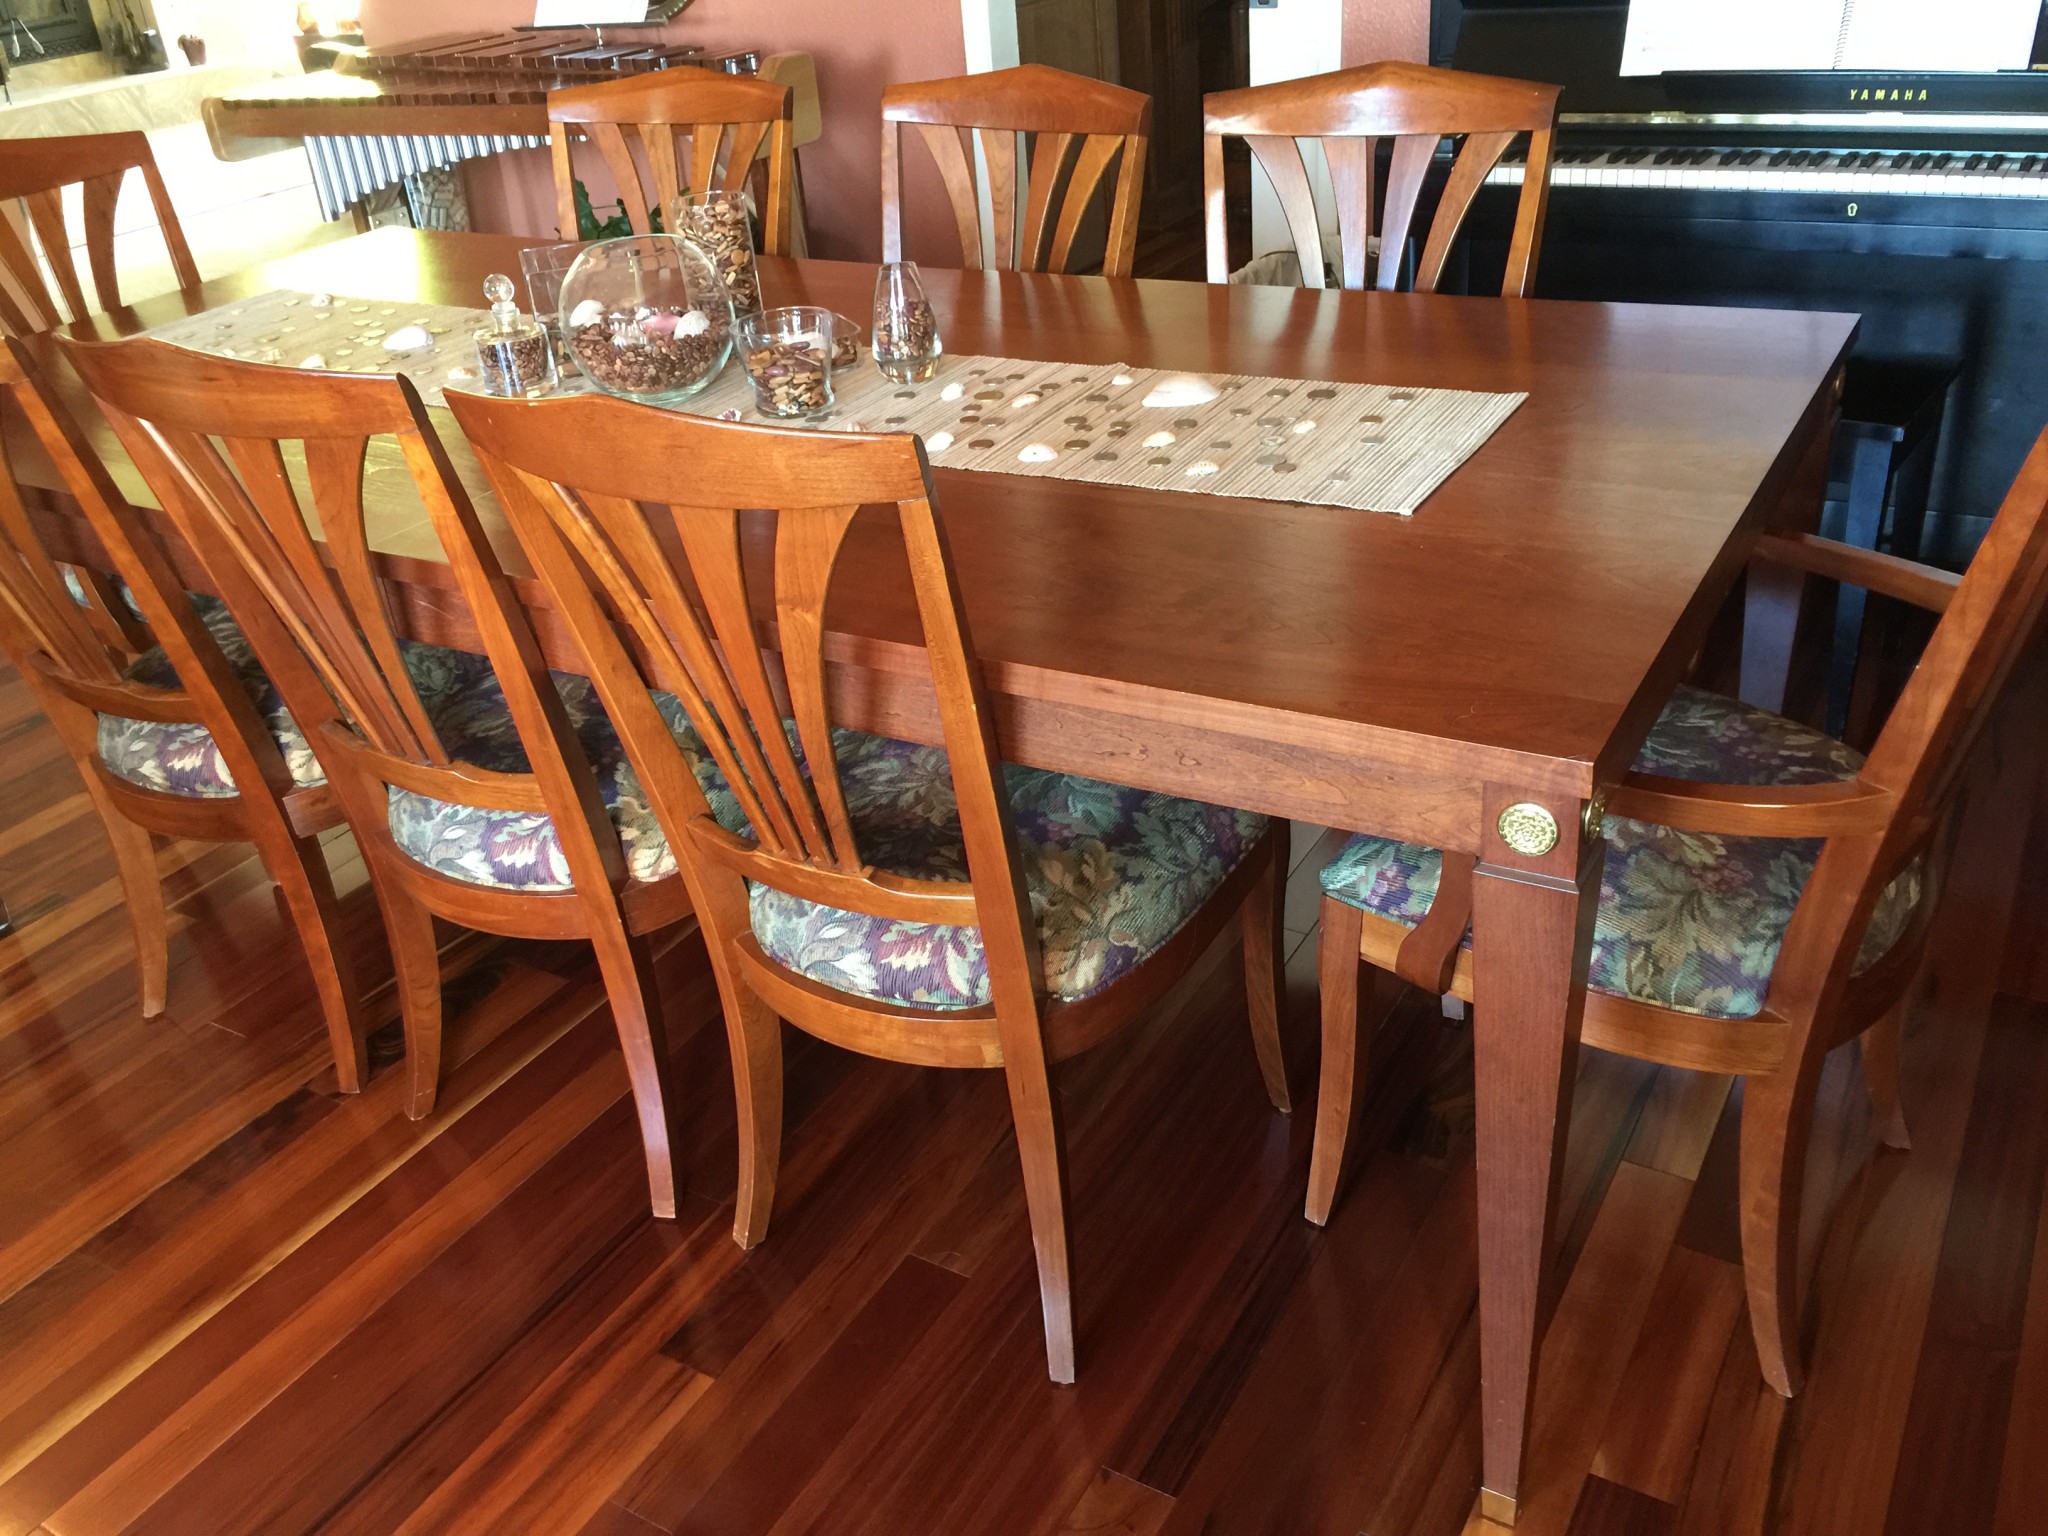
Dinning Table – 1999
Shortly after we bought our house, I built a table out of solid 6/4 Cerry. I’ve always wanted to make a big-ole table out of Cherry. So I found a good deal on a bunch of rough cut giant Cherry boards, and I got to work. I have to say that I underestimated the work of dimensioning the lumber. I was used to working with S4S or at least S2S lumber, so starting with boards that had no flat surfaces was challenging. At the time I had a little six inch delta jointer, but it was too small to get a straight edge on the boards. I ended up buying a 20 foot piece of 4×2 inch channel aluminum that was very straight. I attached this to my table saw fence, and with the help of my dad and a very sharp blade, we got got the boards all ripped with straight edges. After a ton of planing, we laid them all on the floor and jointed them with biscuits. The total length was 107 inches! I did not have access to a big thickness sander, so I set to work with a 4 inch belt sander to flatten the whole slab. This was slow work and required a lot of flatness checks. When the slab was done, I cut 18 inches off the end and set it aside to make a leaf. Finally, I used a circular saw with a very sharp blade to cut the table in half so that the leaf could be added for big parties and holidays. Man, my butt was puckered when I made that cut! The final table, without the leaf, is 89×42 inches. The legs are also solid cherry and are tapered. I found some brass bolt covers to with a nice rosette and cut off the screw tab. I epoxied these to the leg tops to add some interest and soldered up some brass caps for the bottoms of the legs. Below are a couple of pictures. I did not make the chairs – It would be fun to make one chair, but I am not masochistic enough to build eight! So we bought the chairs and mixed the table stain so it matched the chairs.
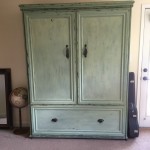
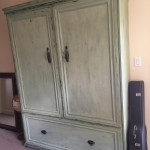
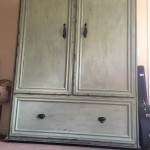
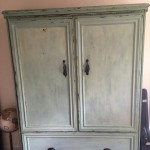
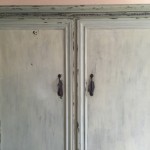
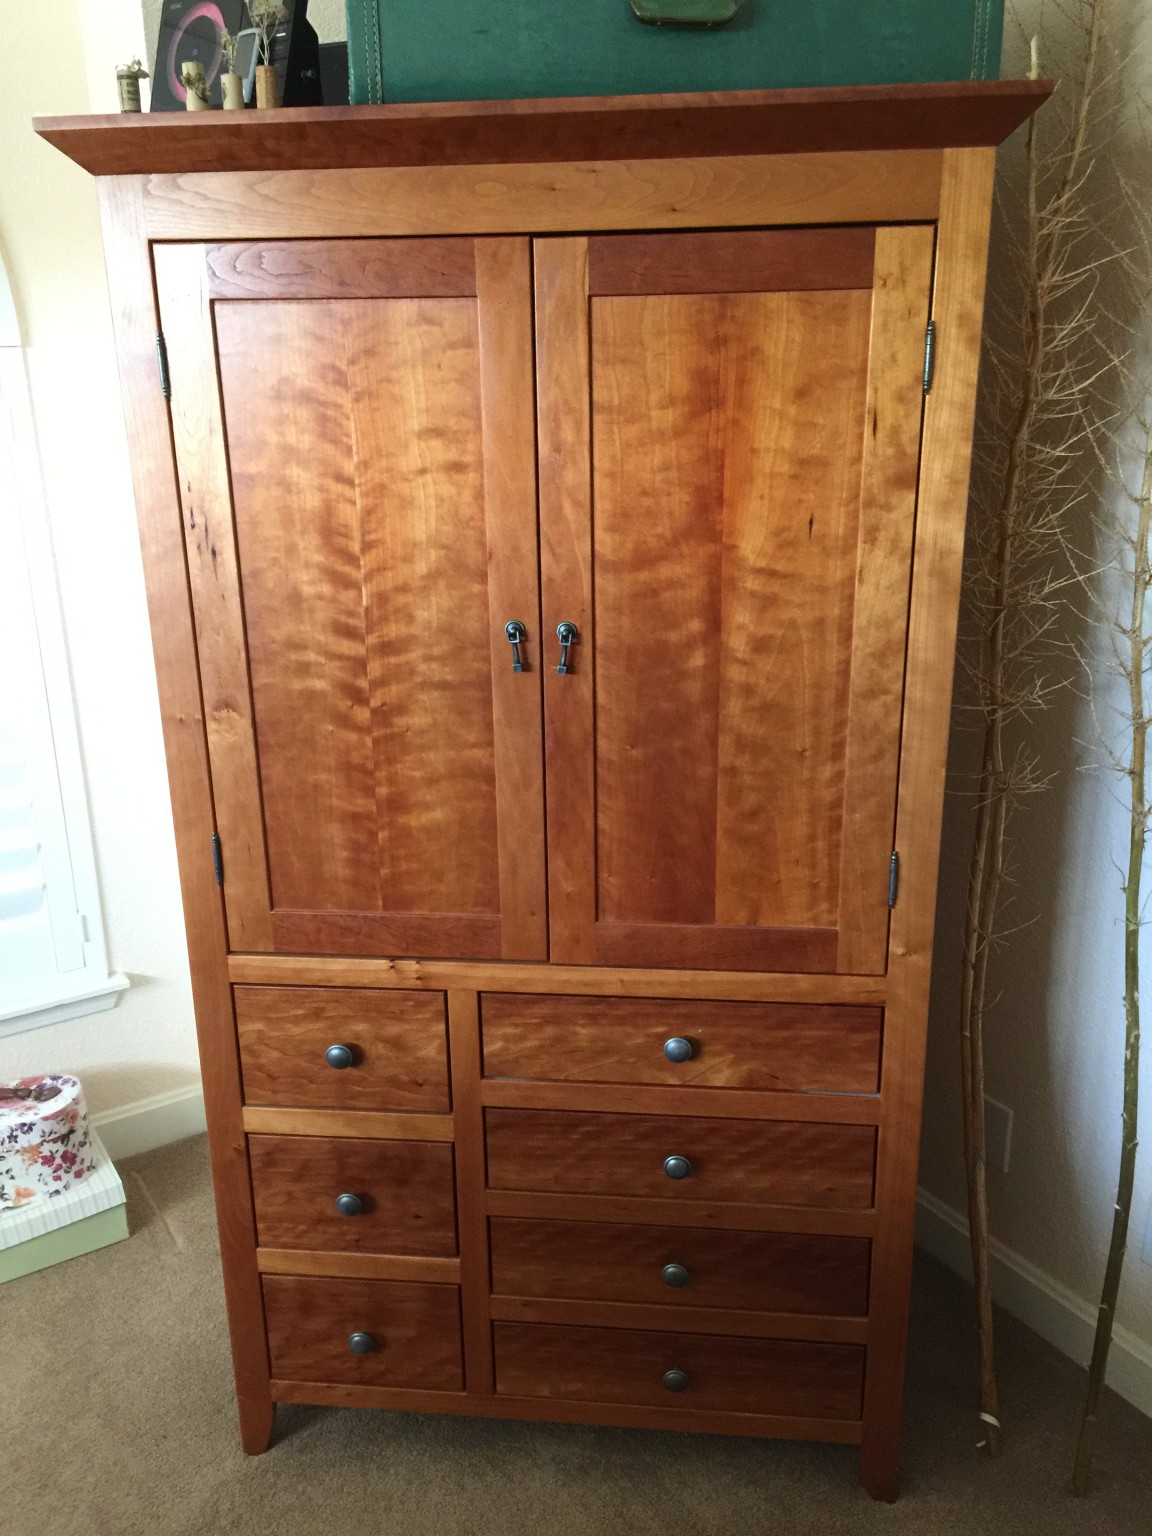
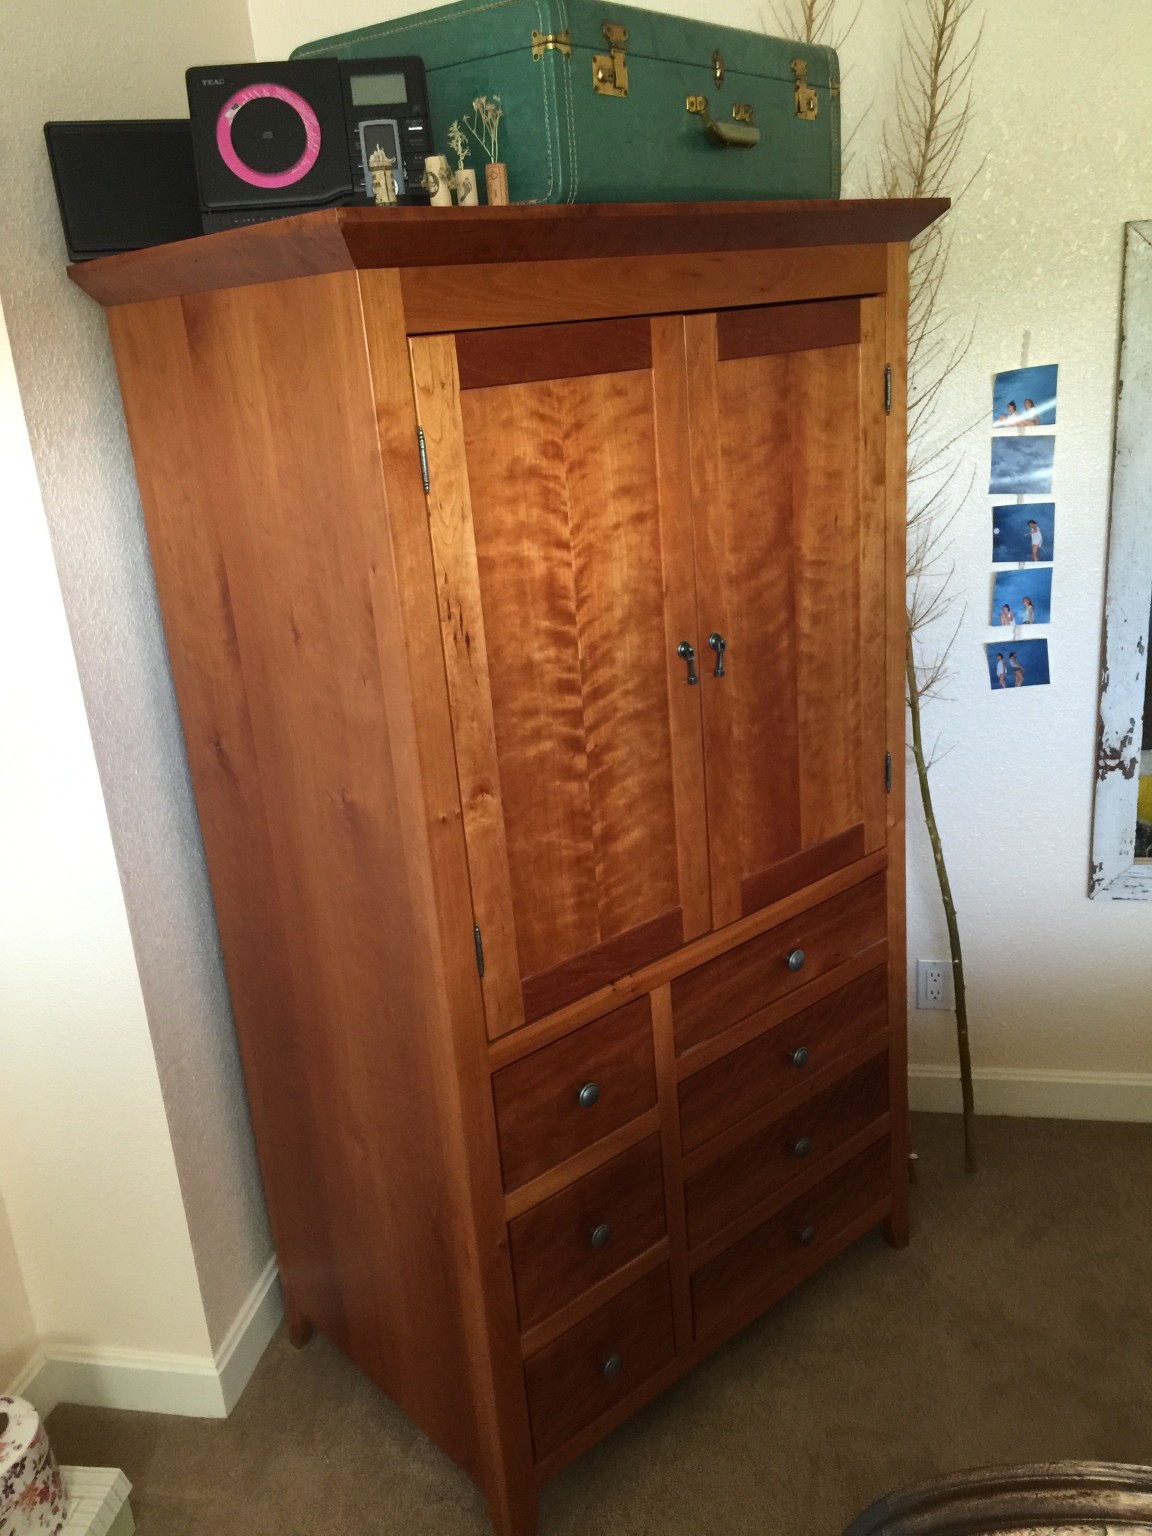
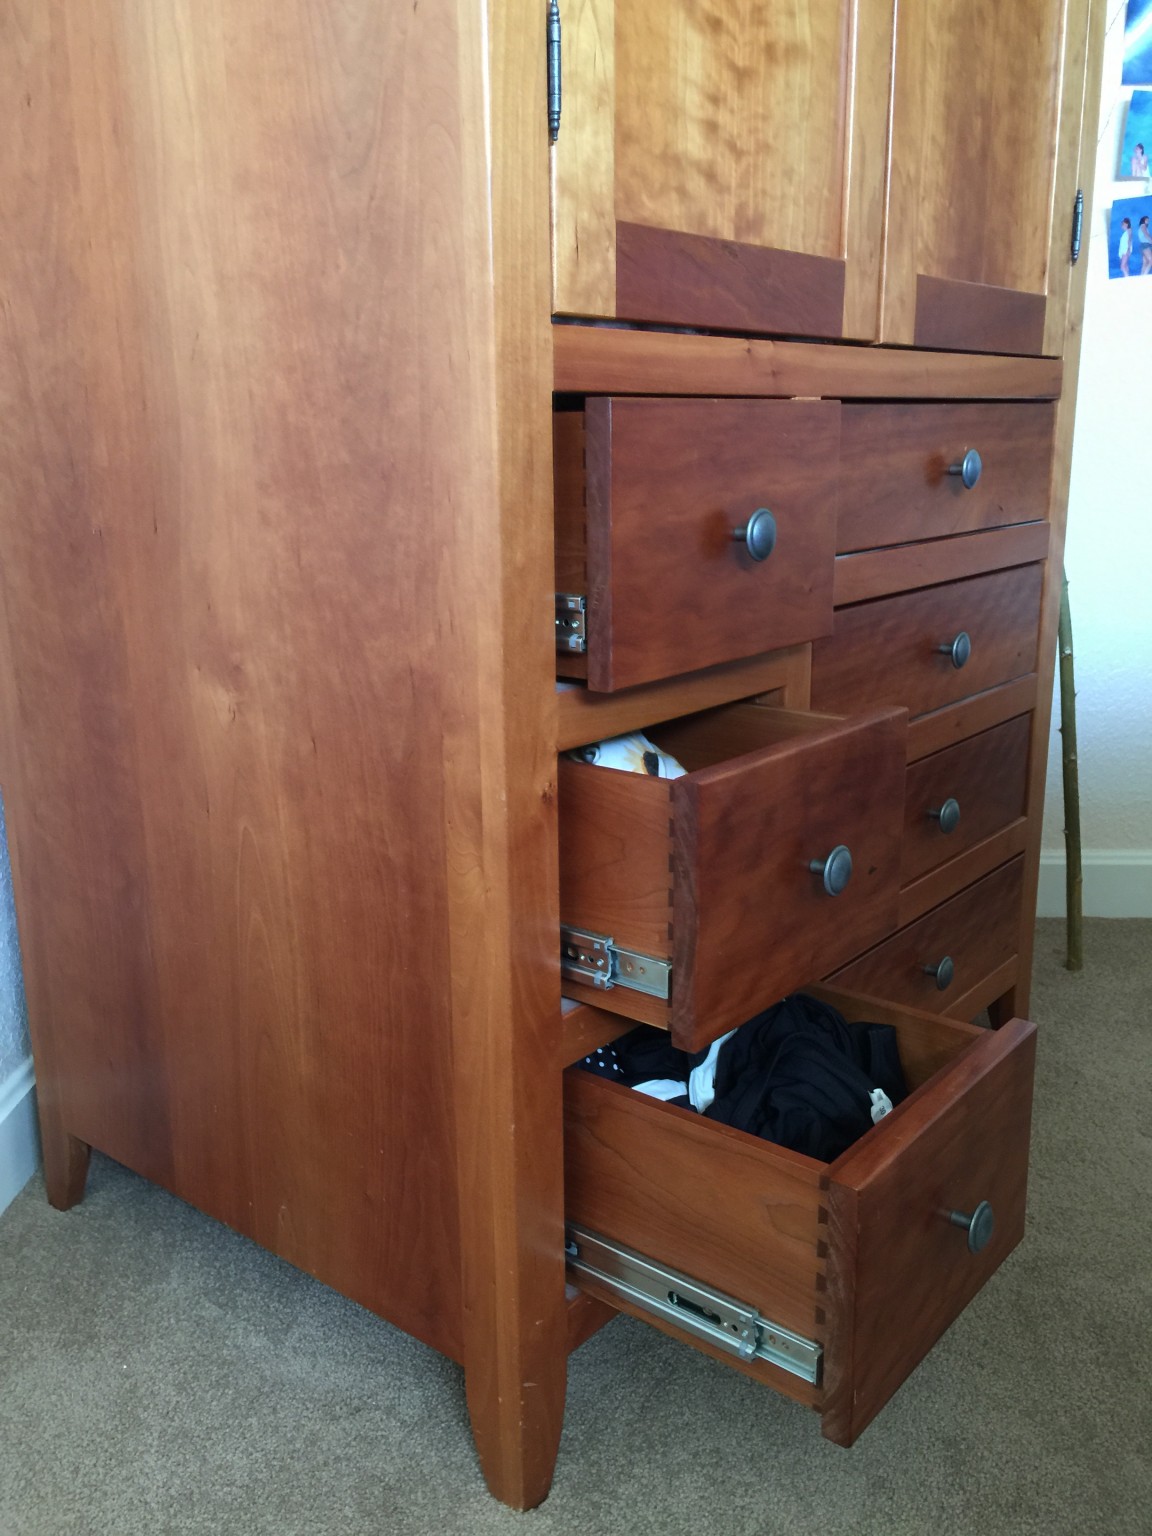
Lily’s Armour – 1998
When Lynette was pregnant with Lily, we decided to build an amour for her. The design was inspired by a cabinet that I had scene in a catalog, but we customized it to our needs. This build from Cherry and uses pretty typical cabinet jointry. However, I wanted to use as much solid cherry as possible – minimum plywood. So I made the sides out of jointed solid cherry 1/2 inch panels. Of course, this complicates all of the construction, because you have to account for expansion – but it was worth it. The cherry looks so much better than veneer plywood.
Also notable are the door and drawer faces. The doors are made of book-matched figured cherry and the drawer faces are made of quilted cheery that I had been saving for just the right project. This is also the first time I built dovetail drawers (machine cut, but hey, they’re still dovetails!). This project was also notable because Lynette and I built it together – lot’s of fond memories of building that as she waddled around with Lily in her belly!
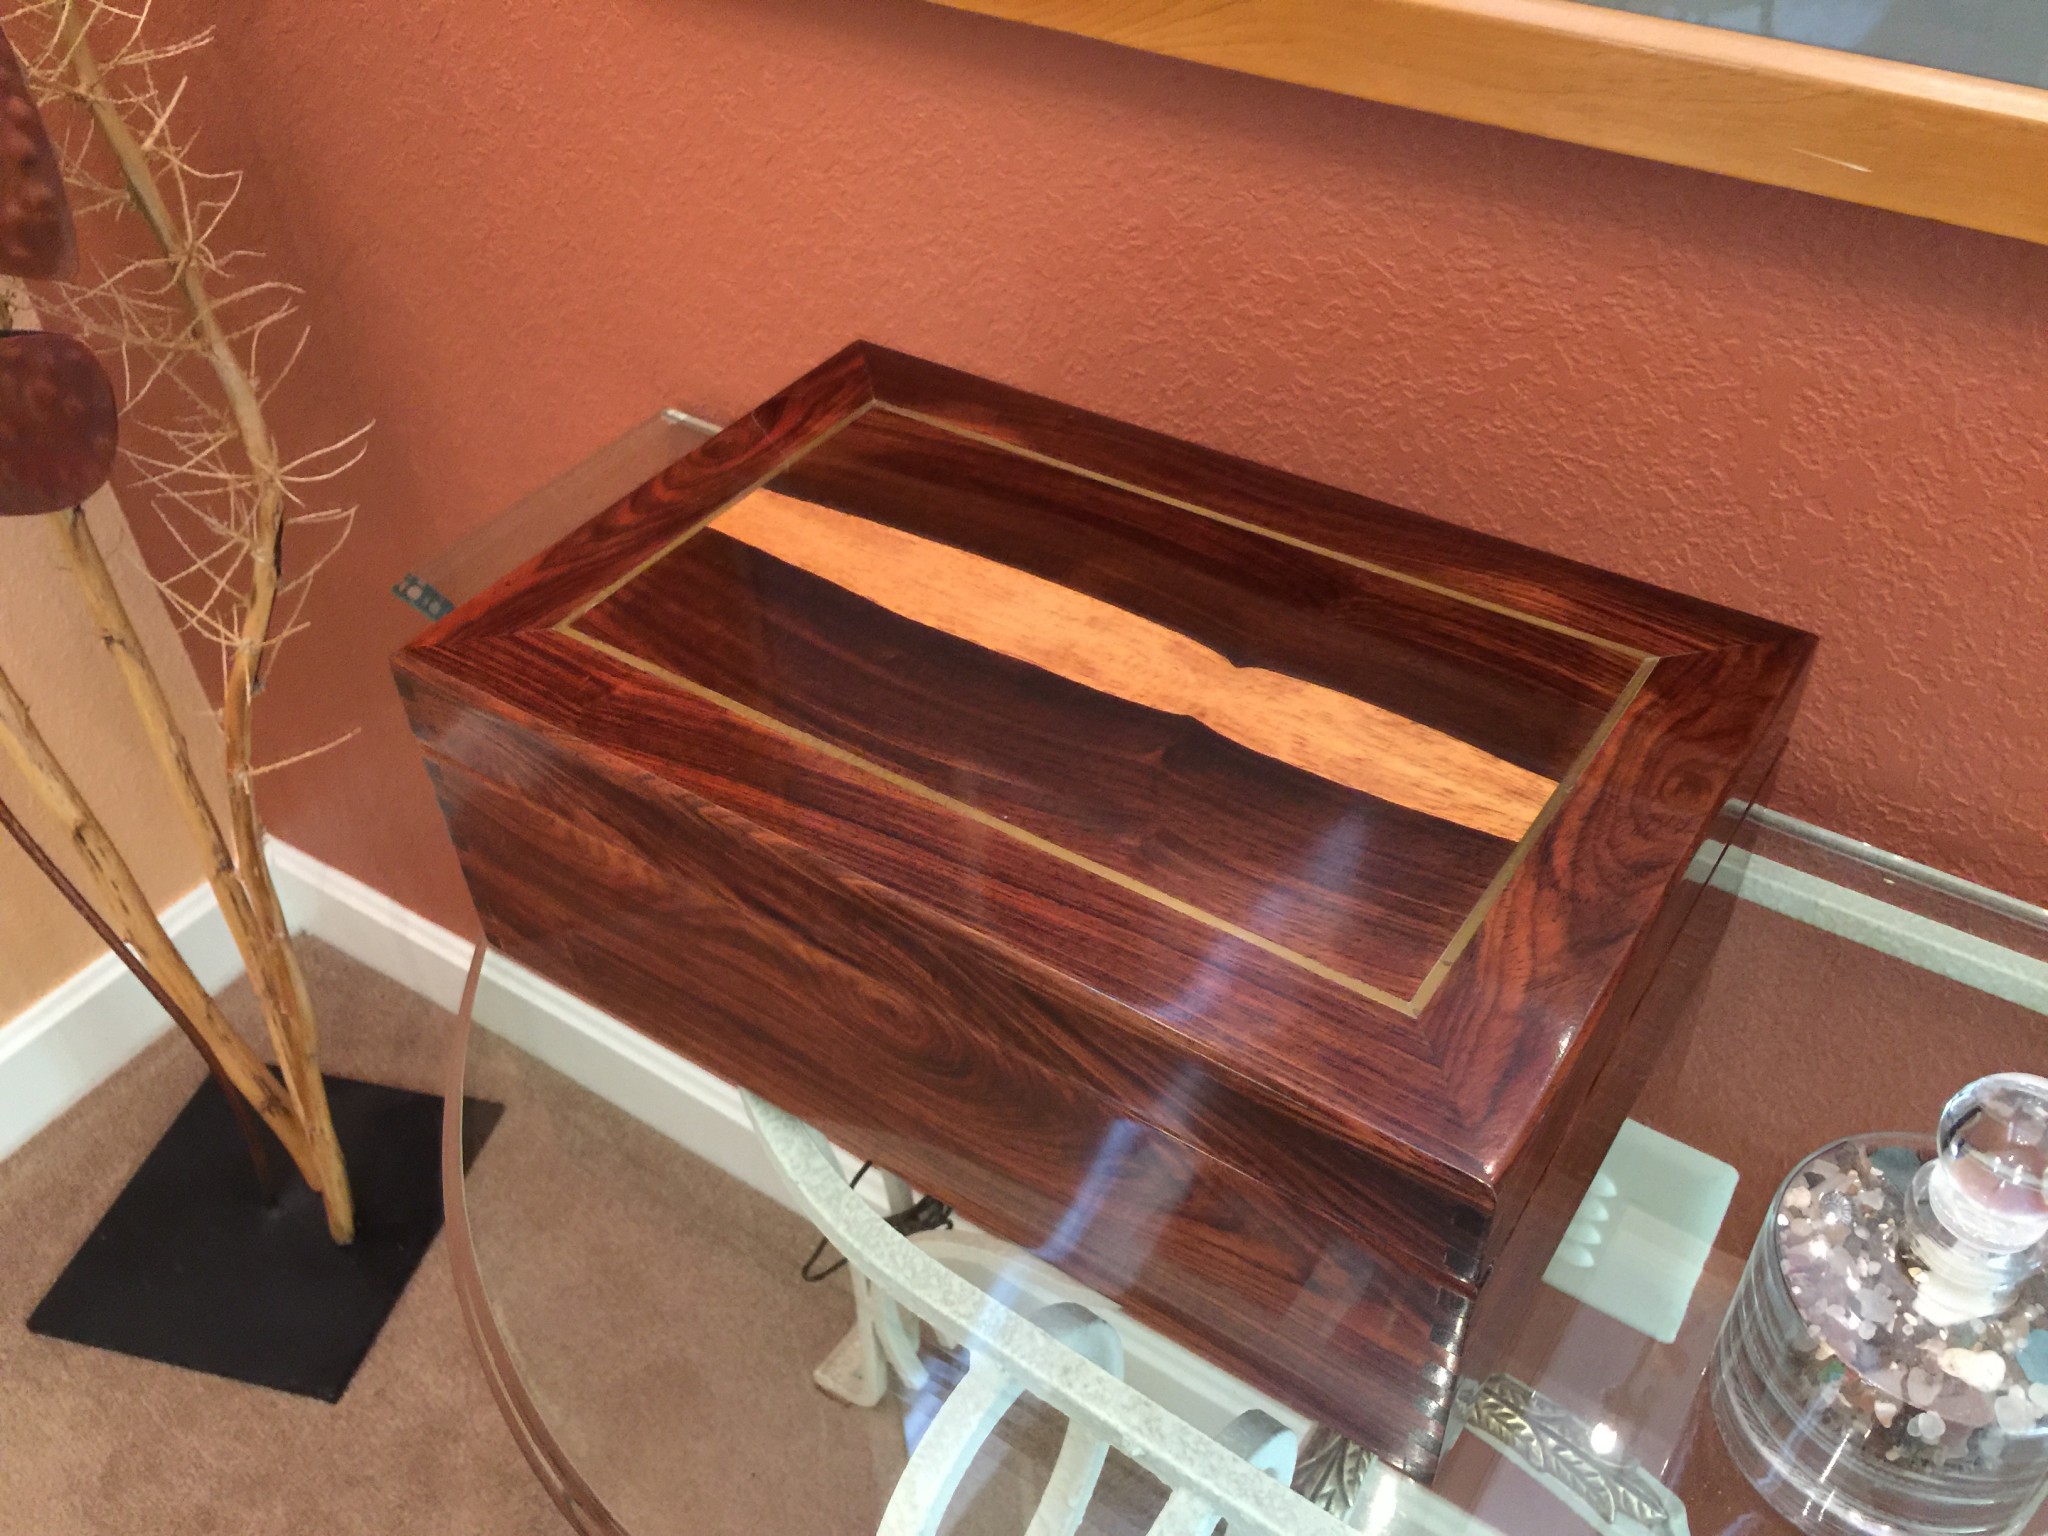
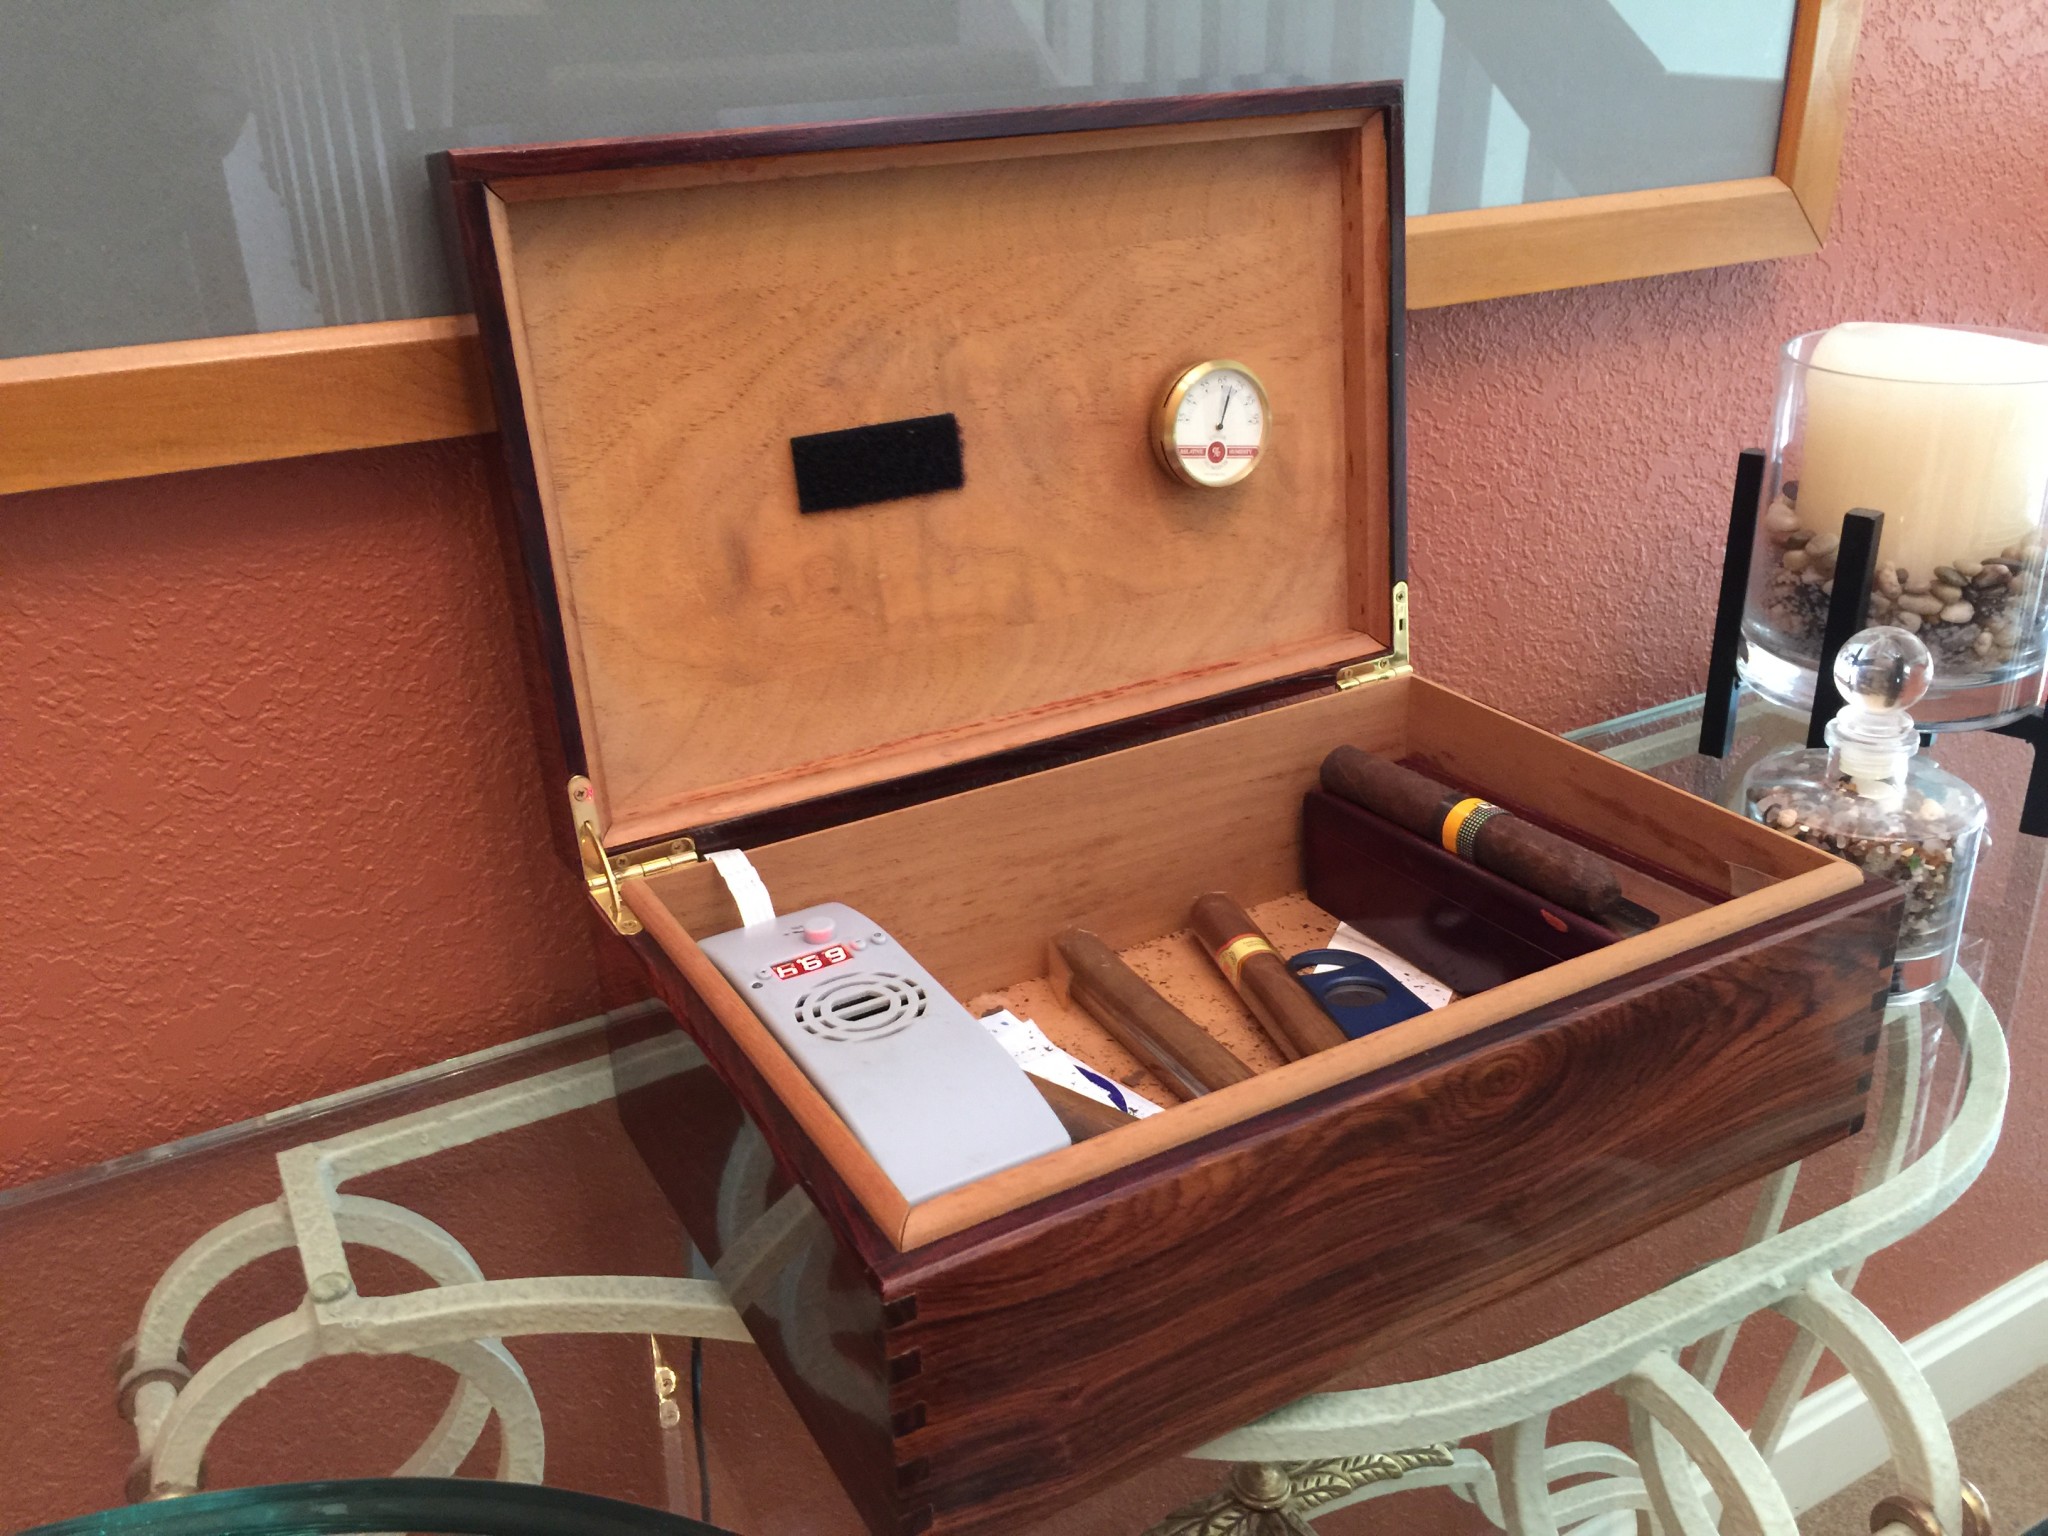
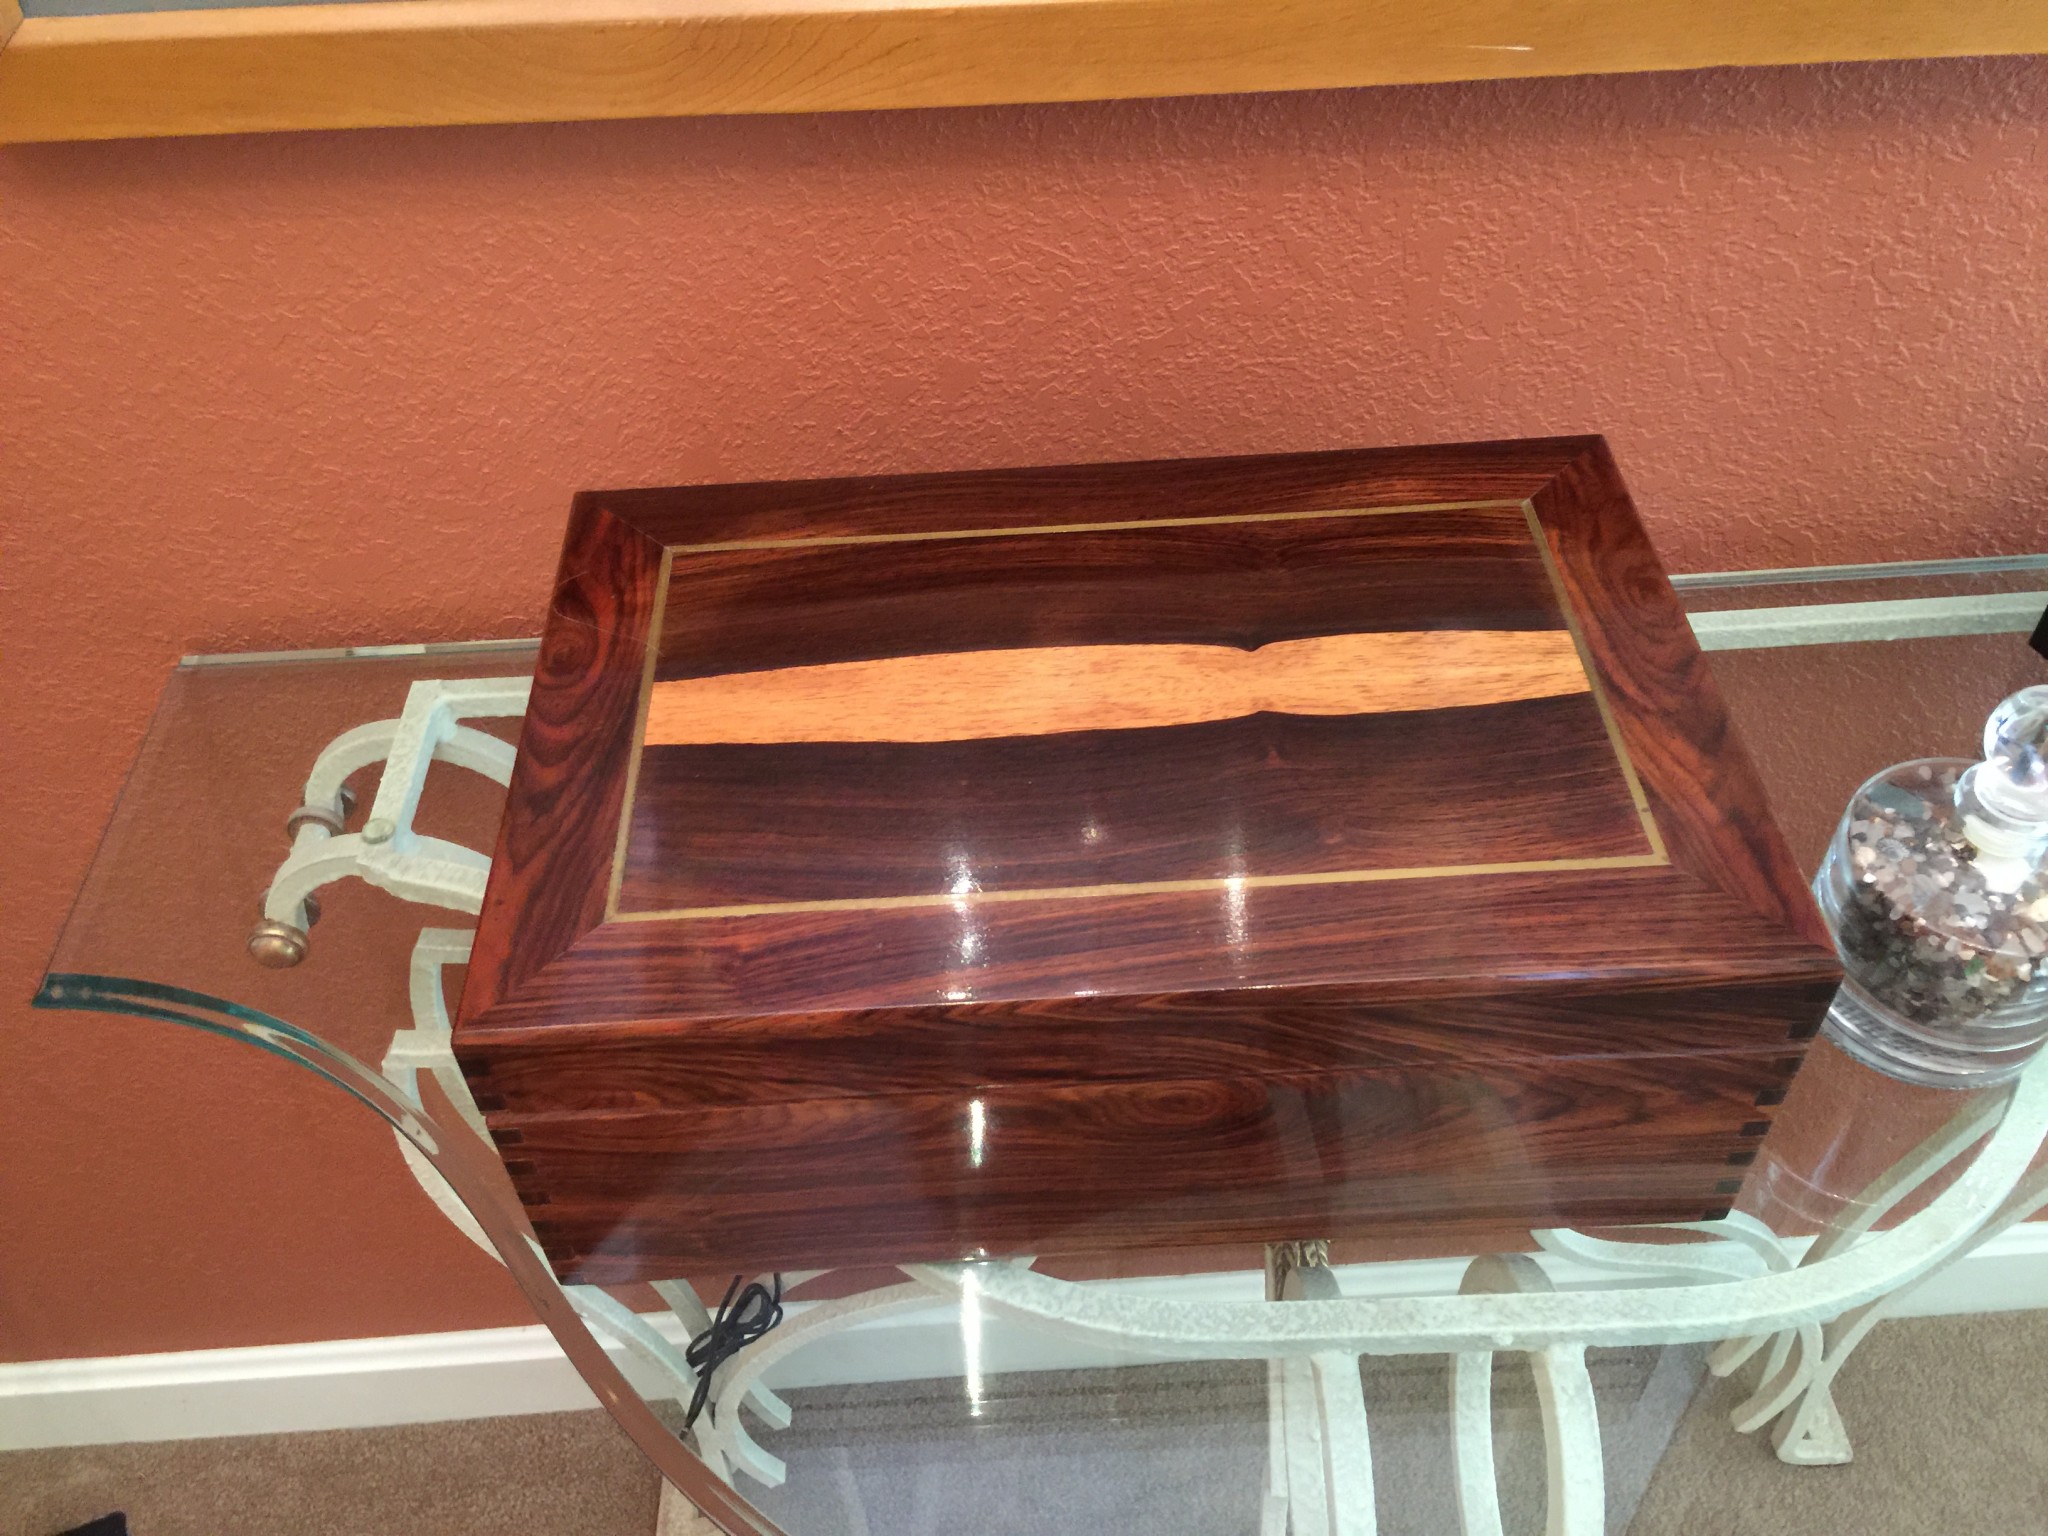
Cigar Humidor – 1997?
To be honest, I cannot remember exactly when I built this, but I recall having a pretty modest Sears table saw and some pretty rudimentary tools. This piece was made from some Cocobolo that I got from my bud, Kevin. (Actually, a lot of the the wood I have I got from Kevin, who is something of a wood hoarder!) The box has basic finger joints at the corners and is lined with Spanish Cedar. It may be hard to see from the photos, but there is 1/8 inch brass inlay in the top that I epoxied in. The brass started out really shiny, but despite the lacquer finish, it has tarnished over the years. The top was a bit tricky to make because it is not a floating panel. Rather, I epoxied thin slices of book-matched Cocobolo to a 1/4 inch substrate. Then I very carefully planed and sanded the surface until the Cocobolo was basically veneer. This allowed me to securely glue the mitered frame pieces in without worrying about expansion. The top was pretty cool, because I kept the yellow sapwood to form an interesting vase shape in the top. I finished the top with ten-ish coats of lacquer and then wet sanded to get a high gloss finish.


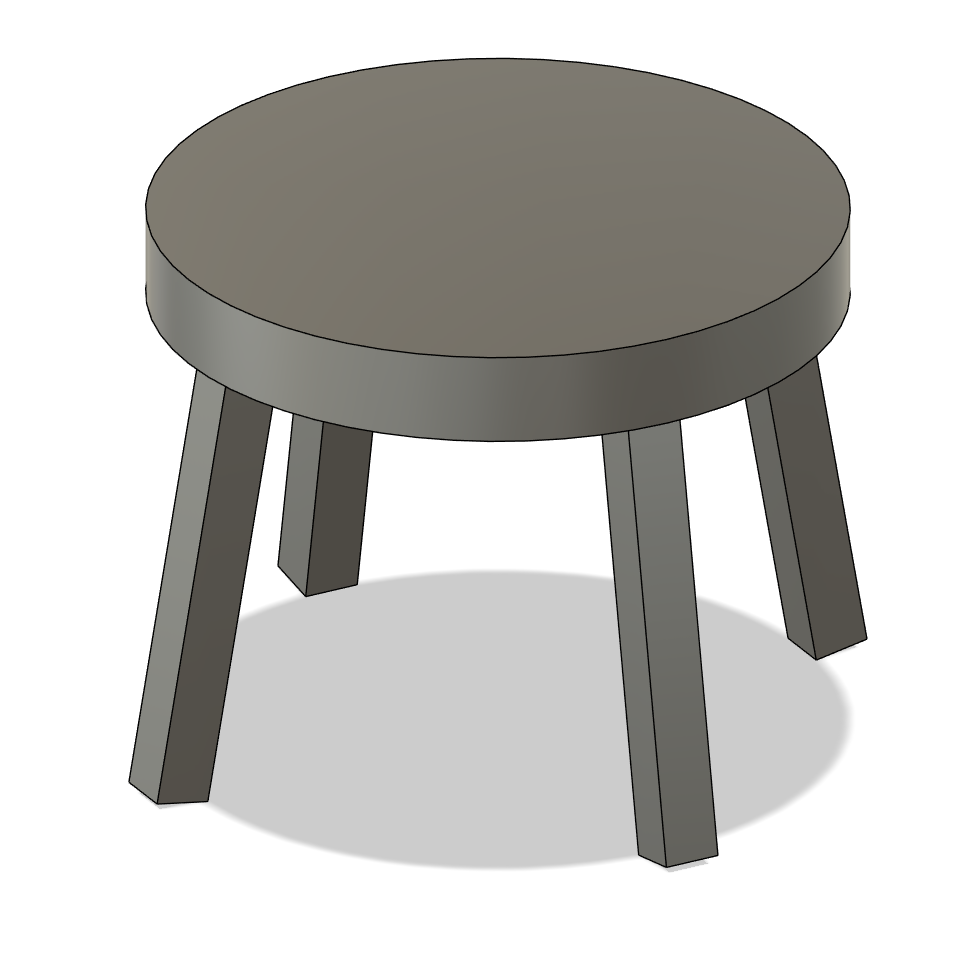
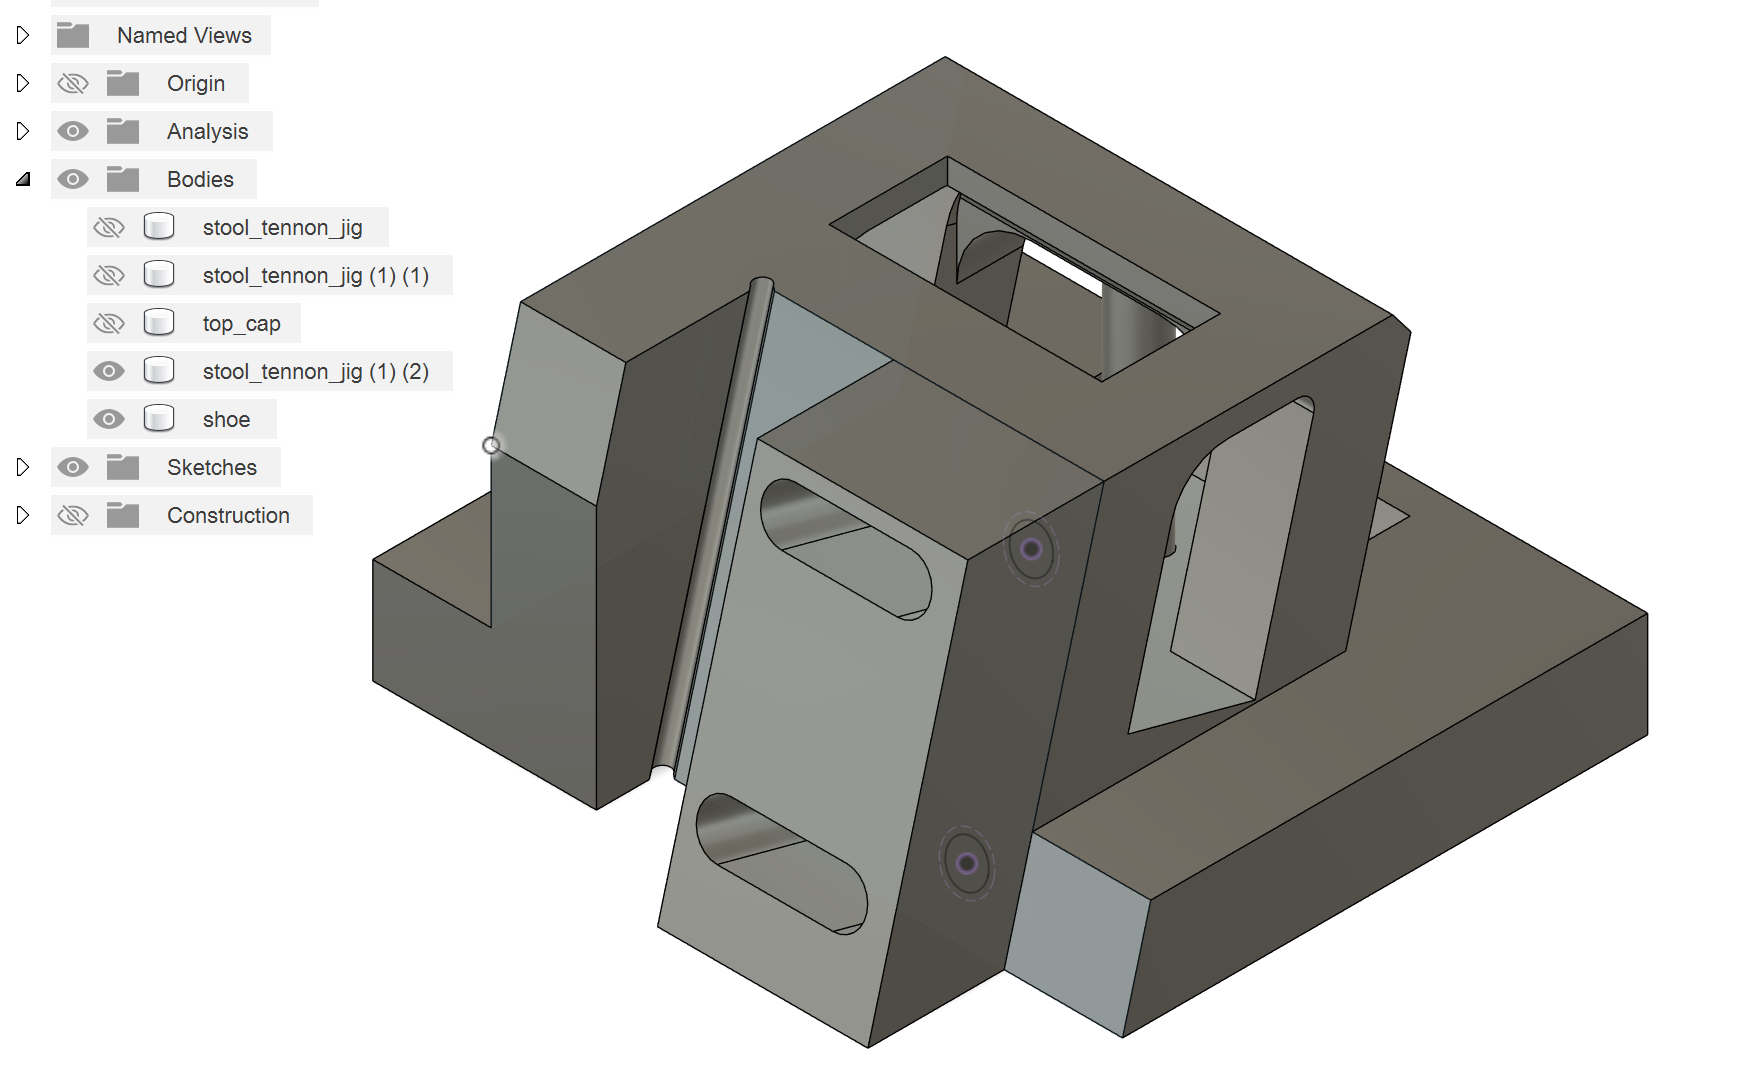
Cherry Stools (July 2014)
Built from my sister’s cherry tree logs that we stickered and dried.