Our xylo-adventure started when Jack asked for a xylophone for Christmas. He wasn’t asking for a Fisher Price, but rather a full-on concert grade instrument.
Jack plays piano and percussion in his school bands and wanted an instrument to practice at home. My knee-jerk response was to say “sure, dude!” When I did my research, however, I almost had a heart attack- I was not going to pay $2000-$4000 for a series of wooden blocks! So I, an electrical engineer and a weekend woodworker, set out to build one. “How hard could it possibly be to build a one?” I asked myself. (Answer: pretty damn hard!)
So last December, I jumped in with both feet. Like most people, I assumed that Google would do the majority of the work for me. Over Christmas break, I begin scouring the web. My laptop kept me warm for countless winter evenings while I searched for a canned xylophone recipe. It quickly became apparent that if anyone like me had built a high-end xylophone, they had not published their efforts on the web. I found lots of “toy” efforts built from PVC pipe and the likes, but got exactly zero hits on building a concert xylophone. Along the way, I did find one amazing site called La Favre that had tons of info about building a marimba (basically a giant xylophone). The La Favre site was pivotal in that it was the first source that I found that addressed tuning of the bars. It doesn’t take more than high school physics to know that the longer the bar, the lower the pitch; I, therefore, assumed that tuning just meant cutting the bars to the correct length. Au contraire – the tuning of idiophone bars (the fancy, scientific name for musical instruments that you whack with a stick) is performed by shaping the underside of the bars in just the right way.
Getting shape right is really the secret sauce to building an instrument that sounds great. Stick with me and you’ll hear a lot more about this!
A Teaser…
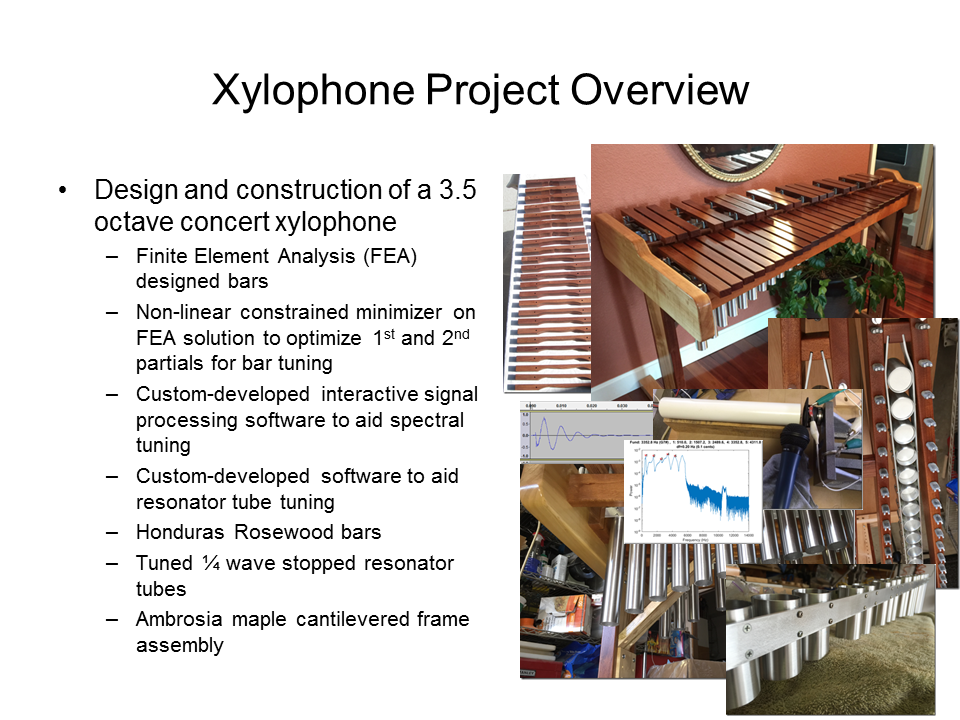
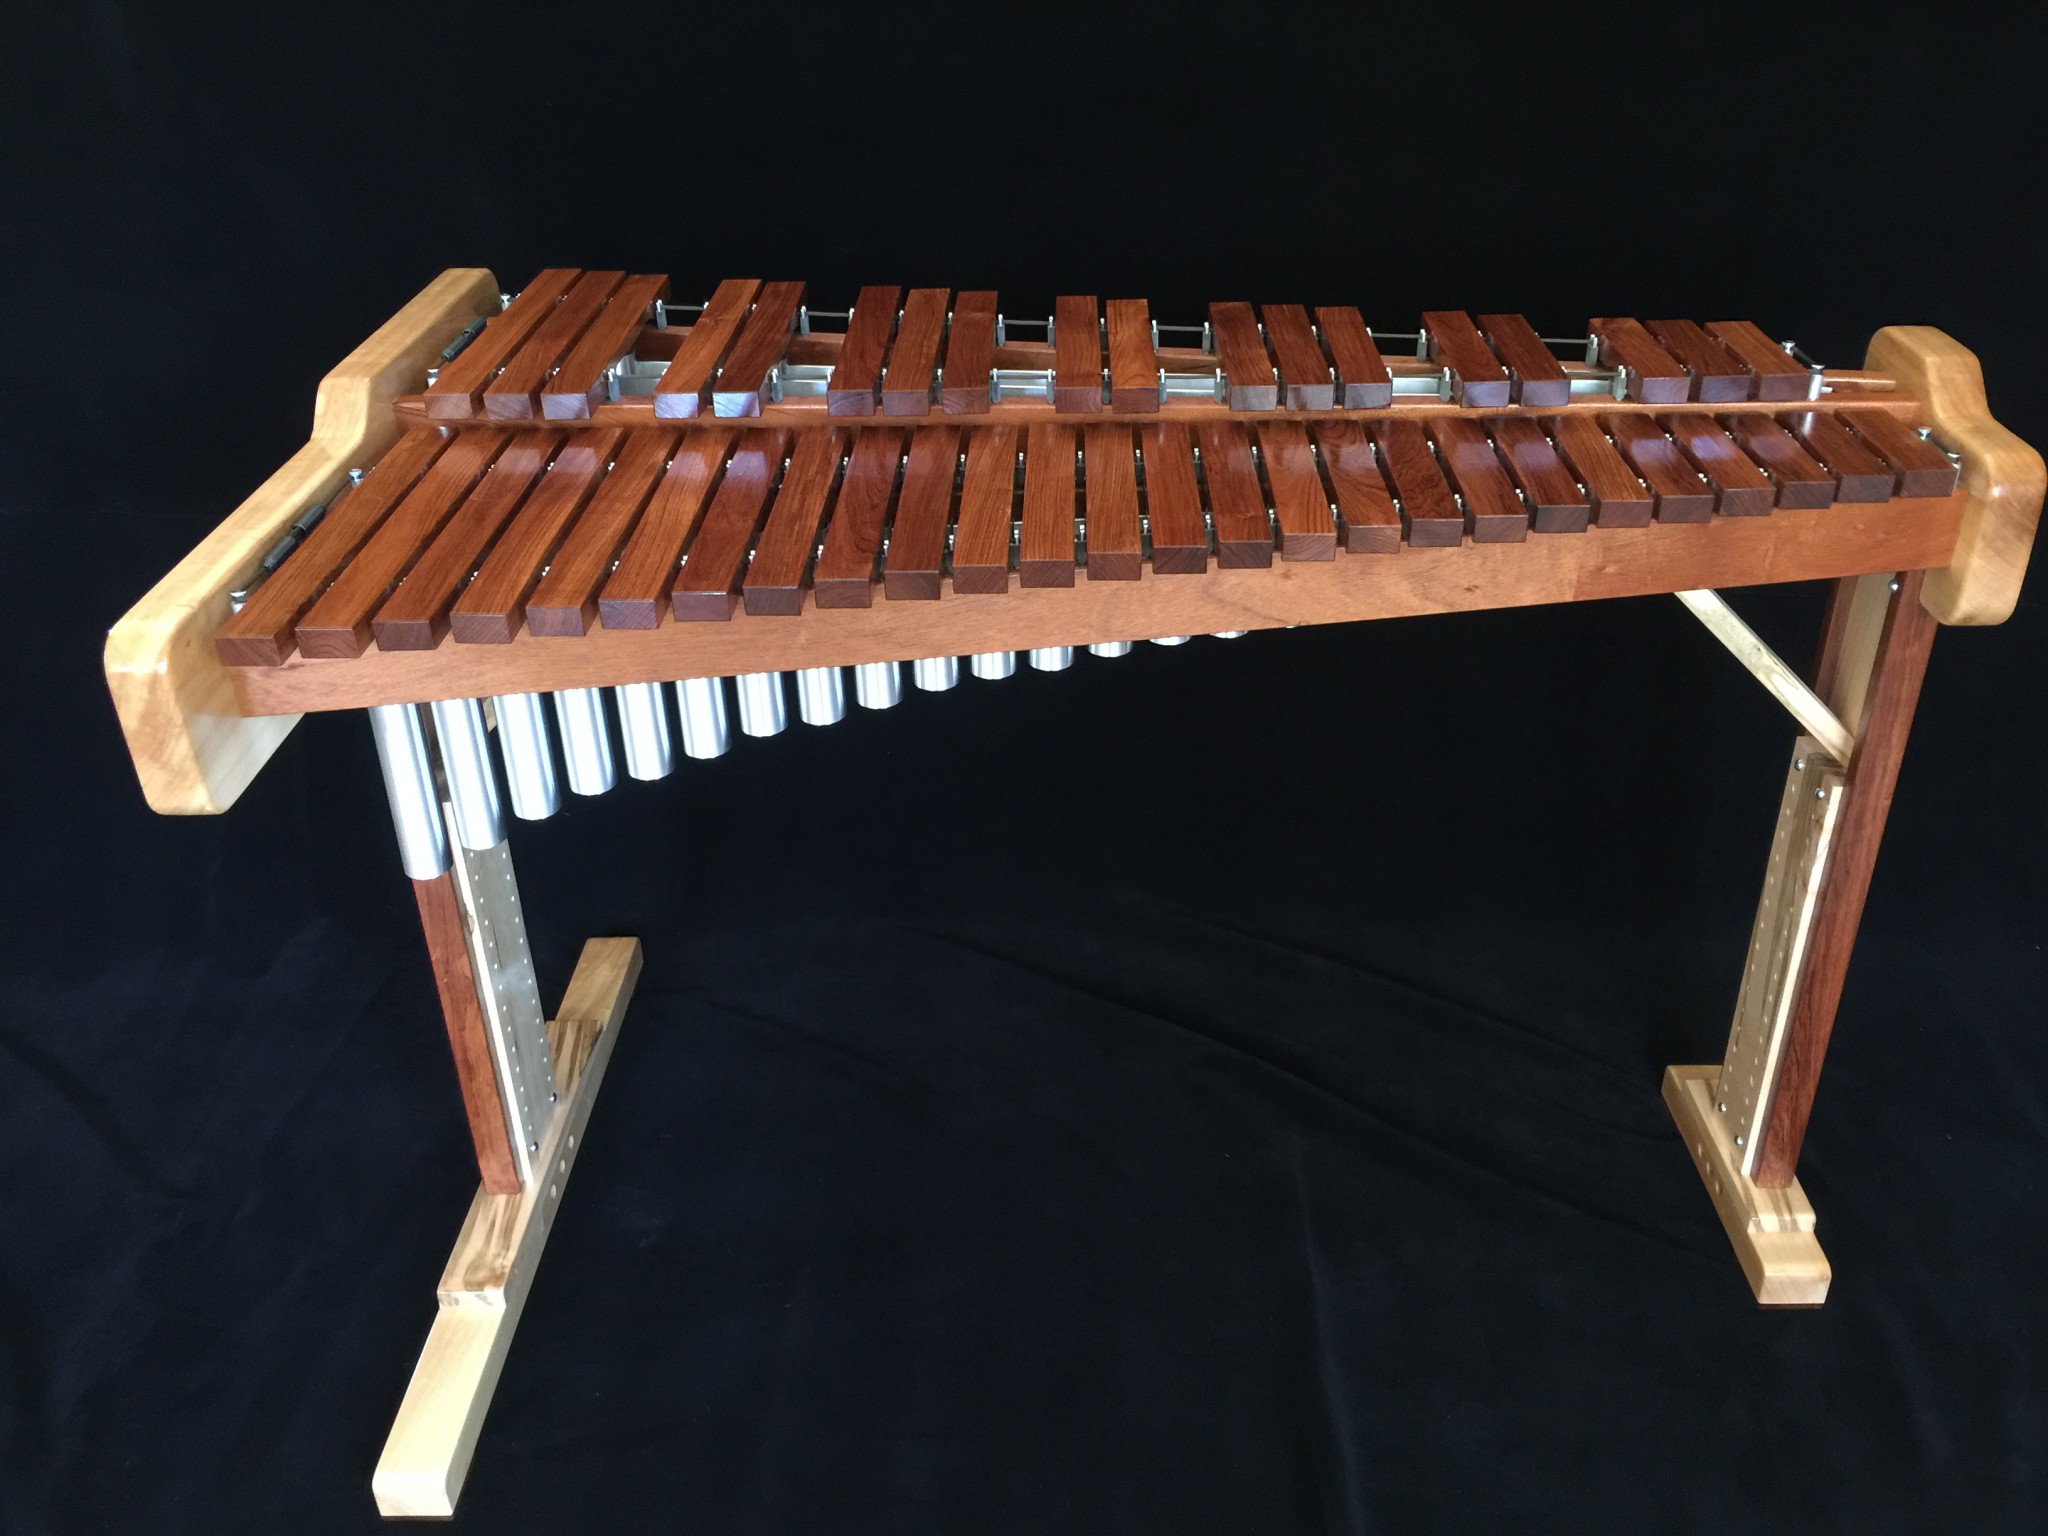
As a teaser, below is a one-page summary of the xylophone that Jack and I built. Read the subsequent posts if you want to learn more about our journey.
Here is what it sounds like. These are just a couple of clips of Jack noodling around.
Here is a photo of the completed instrument.
May 21, 2016 update: Here is a sound file of Jack playing a song he learned. The recording is so-so, but hey, I’m not a recording engineer!
WOW guys, this is absolutely awesome!
The look is stunning as well as the sound. You did a superb job!
I can’t praise you enough. Brilliant. Just brilliant!
Thanks for the praise. If I were to do it again, there are a few things I would change, but overall we were pleased. Originally, we planned to put it in Jack’s room, but my wife liked the look of it so much she decided to put it in our dining room by the piano.
Rich
Hi, just wondering what you would change? The reason… well, my wife was interested in a xylophone, but I bought her a glockenspiel… y’a you get it, learn as we go. My dad was a cabinetmaker by trade, and I love woodworking, so even though I know that it won’t be easy… I’m going to give it a go. I’ve seen the la favre site, found a pdf of an old book (how to build a marimba) and now found your site… like the look of what you built, so am trying to put together dimensions, as well as what I am going to use. Frame in oak… right now I’m looking at key wood…. rosewood (not sure I can get) padauk or dark cherry is more likely… although I can get other woods, but not sure of sounds… (only saw those 3 woods used for keys in my searches).
I know it’s been a few years, but hope you built an instrument Allan! I’d be interested to hear what wood you used and the results. I tried a few domestics that I had around, but none compared to the Honduras Rosewood.
b/r, Rich
Hi, don’t think it went through the first time, but congrats… well done. I found your site after finding a pdf book on making a marimba and the la favre site… just wondering… what would you change? I’m looking to. Hold a marimba or xylophone, and debating about the Yamaha sizing vs the sizing I found in the marimba book I have. Also, not sure if I can get rosewood here, but also looking at parallel or cherry.
thanks for all the deep technical stuff.
Right now, I’m just lookng for a simple formula for the tuning curve,
Where does it start in relation to the fundamental node/ string hole.
How deep to start the initial cut?
Hmmm. Not sure I understand your question Floyd. As described in the blog, the shape needed to yield the correct frequencies was computed by the software. I don’t think there is a simple formula that can provide sufficiently accurate shapes.
Rich