With our newfound knowledge of tuning xylophone bars, Jack and I were prepared to go all in – time to buy the rosewood.
We live in Albuquerque, which is not a large city, so I was prepared for a protracted search for affordable rosewood. I found a few sites online, but all were pretty spendy and mostly catered to users buying small quantities. On a whim, I checked out a local vendor called Albuquerque Exotic Hardwoods (now called World of Wood). To my surprise, they had just received a small shipment of Honduras rosewood! The owner explained that there were some “quality issues” so they were selling it for half price.
Like most woodworkers, I typically seek out stock that has the most interesting grain. I generally build furniture that has simple lines and let figure in the wood provide the interest. In selecting stock for this project, I had to fight that urge and select the most boring planks, since these will typically be the most homogeneous. This nearly killed me, and to own the truth, I bought one extra plank that was highly figured and just too pretty to leave at the store.
I know you are going to ask what the price was, and I’ve racked my brain trying to remember, but I’m afraid those brains cells got displaced by bar tuning math. I can tell you that I spent about $200 total on the rosewood. As noted, the wood had some checks and knots that I had to cut around, so I estimate that had about 30% waste. (But did I mention that the wood was half price?!)
The width of the bars doesn’t greatly affect the timbre, so I sized them to be consistent with what I had nominally observed on commercial xylophones. The Yamaha that provided my sizing template had bar width at 1.5 inches, which was right in line with most other xylophones I had seen. The rosewood boards that I bought were mostly about 5-7 inches wide, so for each board I figured out how many widths I could rip out of each plank and started cutting.
When I began ripping these on my table saw, I got my first surprise; despite selecting boards with pretty straight grain, there was so much internal stress in this wood that after ripping the first six inches or so, the piece against the table saw fence (the 1.5 inch strip I was ripping off) started bending badly against the main plank. This is not uncommon when rippling hardwood, but I’ve never seen it this extreme. It is also a serious problem, because as the wood bends out it tends to push laterally against the blade, causing binding and burning. It can also result in pieces that are thinner than the 1.5 inch width target. Not every cut had this problem, but probably half of them did. I am not sure if this is a common problem with rosewood, but I definitely had to address this challenge. So I did two things. First, I ripped the pieces about 1/8 inch wider than the necessary final dimension to allow for thinning that resulted from the bending board.
My second mitigation was to put a screw in the end so the ripped piece couldn’t bend out too far. I wish I had a photo of this, but I didn’t take one, so here is a cheesy illustration that will hopefully make clear how I addressed this issue.

Basically, I would rip the board about 8 inches and them drill a pilot hole at a 45 degree angle. Then, I would drive a wood screw to straighten the 1.5 inch part and pull it back toward the main plank. After this, I would restart the rip, but of course I couldn’t cut through the screw, so rather I would plunge the blade into the existing cut past the screw, then finish the rip cut. This process slowed down the ripping tremendously, but it did tame the board so that I could get decent (not great) cuts. Of course, the resulting ripped boards had a gnarly curve to them, but recall that they only needed to straight over the length of the bar (less than 15 inches).
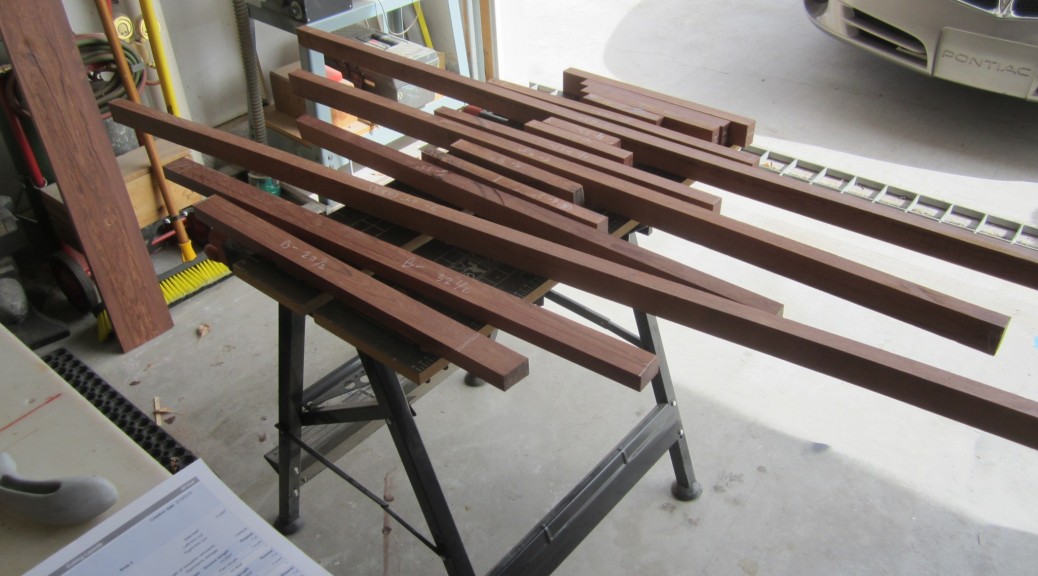
Once I used this technique to rip all of the pieces, I cut out all of the bad chunks. This included knots, splits and checks. This left me with a number of boards that were various lengths, so now I was ready to rough-cut all of my bars from these stock pieces. You can see some of the ripped pieces at the post at the top of this page.
Optimizing Board Usage
With my boards ripped, the next step was to determine the exact lengths for my 44 bars. Recall from a previous post that I chose to use the lengths from a Yamaha instrument I found online. I entered all of the bar lengths from the Yamaha parts list and created the following plot.
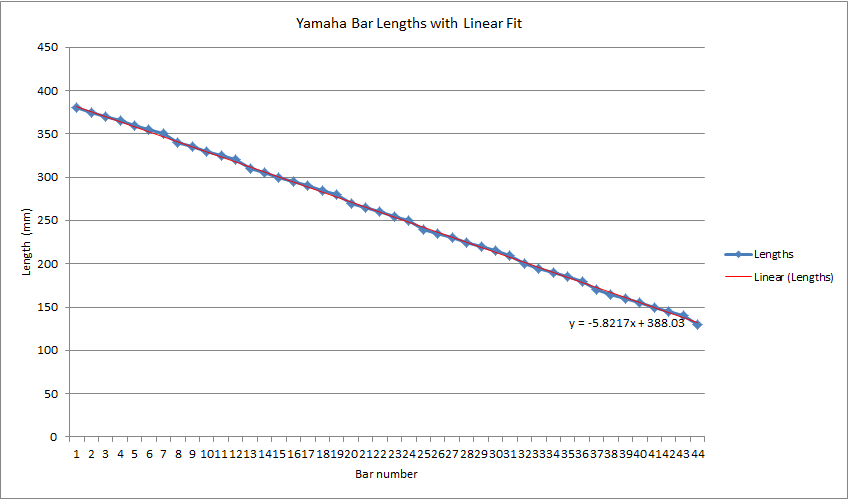
There is a bit of wiggle in the points due to rounding in the published Yamaha data, so I added a linear trend line to average out the “noise,” and used that to compute the lengths for each bar. The bar lengths are contained in this Excel file: bar_lengths
At this point, I had my stock ripped to 1.5 inches, and I had exact lengths for each of my 44 bars. Now many times over the years I have ran into the problem of efficiently cutting a number of lineal pieces from a set of stock material lengths. The classic example of this is cutting baseboard molding where you buy nominally 12 foot boards and chop them up according to your wall lengths. In general, the problem can be solved by trial and error – basically guessing at how to best divvy up the needed pieces into the available stock. However, because the rosewood is just a bit more expensive than baseboard molding (pause here to let the point sink in,) I attempted to be as efficient as possible.
I turned back to the internet to see if I could find some software to help. There were a couple of free programs that I found, but they were pretty cheesy and difficult to use. Ultimately, I ended up downloading a trial version of a program called Cutlist Plus. This software is pretty sweet in that it lets you enter all of your stock lengths and the desired finish pieces, and then computes the optimal assignment of pieces to stock. The program takes some getting used to, but it is very flexible and produces very detailed printouts that make it easy to stay organized. I seem to recall that the trial version is good for month. They have a $39 version aimed at hobbyists, but it only cuts sheet goods (i.e., two dimensional pieces like plywood,) not lineal pieces. The full version is $250, which was too rich for my blood. (Please let me know if anyone out there knows of inexpensive software that performs this function – it would be nice to have it around for occasional use).
After rough-cutting all of the pieces according to Cutlist Plus assignments, I dimensioned each bar to it final size. This included straightening on the jointer and ripping to final width on the table saw. Because I cut each bar a bit long, the final step was to cut each to its finished dimension. The Excel file above contains a column with the lengths rounded to the nearest 1/32th of an inch. I find that my table saw rule guide is the most accurate and fastest way to cut short pieces like this, and the fractional column in the spreadsheet allowed me to quickly set the length.
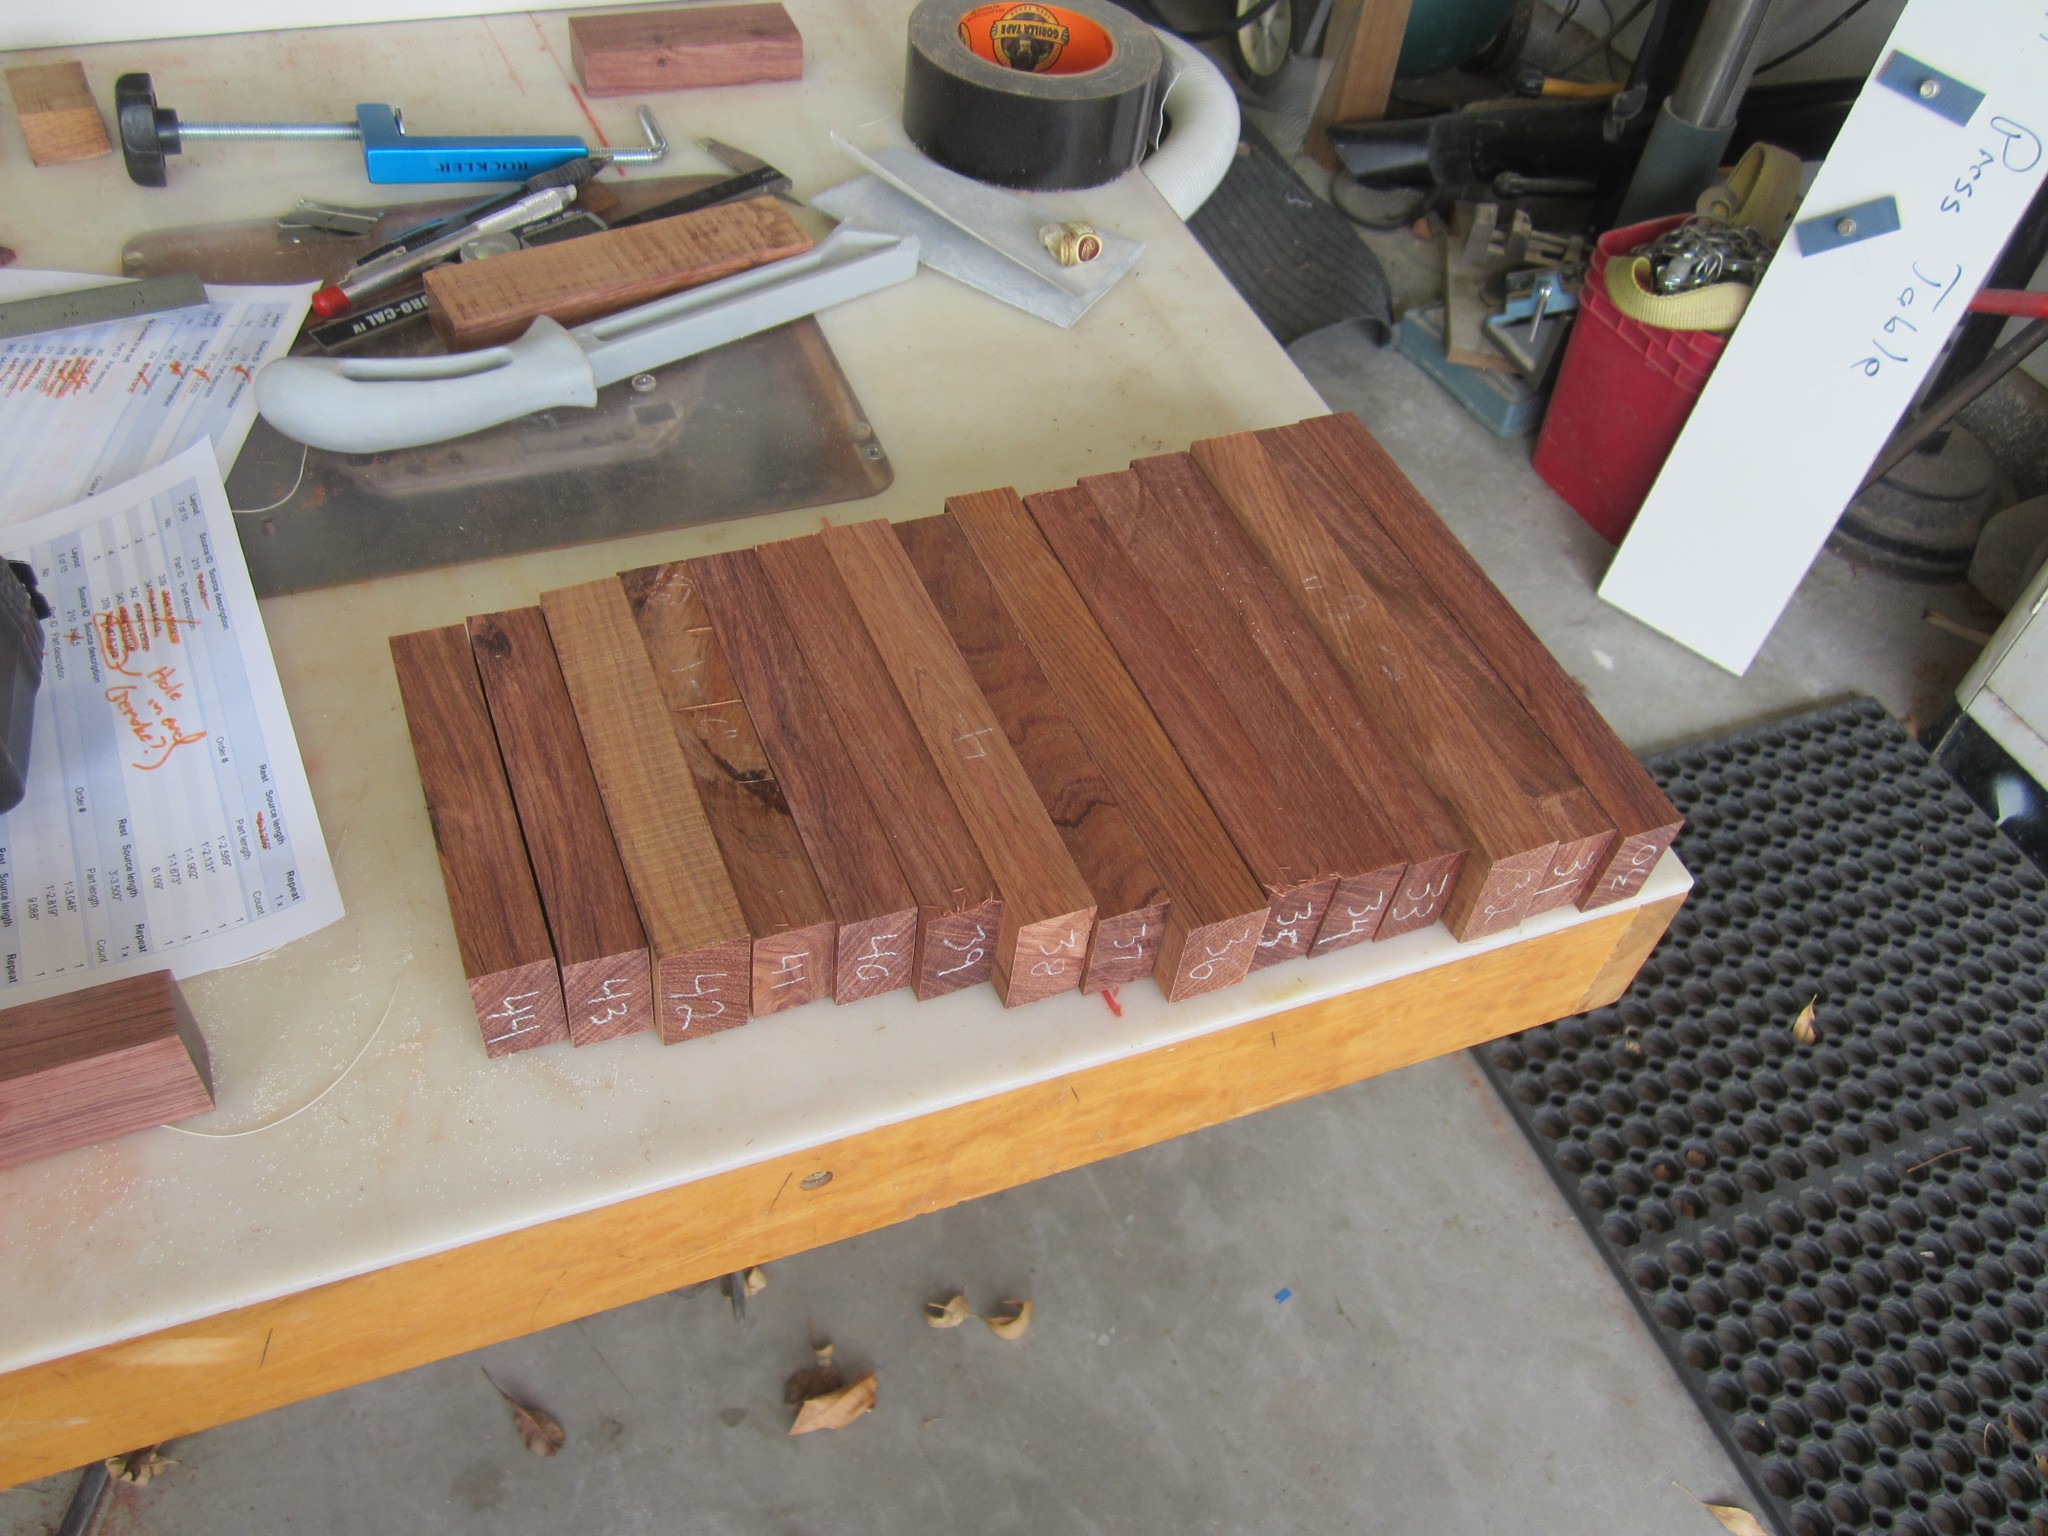
As your reward for staying with us this long, here are some photos of our cut pieces!


In the next post, we will show you more of the woodworking steps involved with turning these “blanks” into tuned xylophone bars and a few challenges we encountered along the way.